Oreo Eyeballs Halloween Treats Recipe
If you’re looking for a spooky, fun, and surprisingly easy Halloween treat, you’re in the right place! This Oreo Eyeballs Halloween Treats Recipe is one of my all-time favorites to make when I want something creepy-cute that’ll wow friends and family. Seriously, these eyeballs are so festive and delicious, they vanish almost as fast as I can finish decorating them — and trust me, you’ll want to keep these on hand for parties, school events, or just a fun night in with the kiddos. Stick around because I’m going to share exactly how to make these creepy Oreo eyeballs, plus all my tips to get ’em looking their best.
Why This Recipe Works
- Simplicity meets creativity: The base Oreo provides a rich, chocolatey canvas, while the candy additions make for fun, eyeball details with minimal effort.
- Perfect portion size: Each eyeball is bite-sized, making it an ideal finger food that’s both kid-friendly and party-ready.
- No baking required: These treats require just a little melting and piping, so even if you’re not a dessert pro, you’ll succeed easily.
- Customizable flair: Swap candy or decorations to match your Halloween vibe or dietary needs without losing that spooky cool factor.
Ingredients & Why They Work
The magic in this Oreo Eyeballs Halloween Treats Recipe comes from combining simple, everyday ingredients in a way that brings Halloween spirit to life. Each part plays a role to create a perfect balance of flavor and fun, with some easy-to-find candies and classic Oreos.
- Oreos: The classic chocolate cookie with creamy filling is the perfect “eyeball” base—don’t skip on quality, as these set the tone for the whole treat.
- Life Saver Gummies: These add a colorful “iris” with that gummy chew everyone loves; you can find them in packs with assorted colors to customize your eyeballs.
- Chocolate Chips: A semi-sweet chocolate chip makes the perfect pupil, adding depth and a little pleasant bitterness to balance the sugar.
- Red Candy Melting Chips: Melted red candy melts or chocolate chips act as our “bloodshot” veiny lines, bringing that eyeball creep-factor to life.
Tweak to Your Taste
I love how versatile this Oreo Eyeballs Halloween Treats Recipe is — with just a few swaps or additions, you can make the eyeballs spookier, sweeter, or even allergy-friendly. Don’t hesitate to tweak it to match the mood or your pantry!
- Variation: Once, I tried adding a dab of colored icing around the gummy to make the eyes even more realistic; it got a big thumbs-up from my niece.
- Allergy-friendly: For nut allergies, make sure your Oreos and candies are safe, or substitute with similar allergy-friendly cookies and gummies.
- Flavor twist: Swap Life Saver Gummies for colored jelly beans or edible eyeball candies for a different look and texture.
Step-by-Step: How I Make Oreo Eyeballs Halloween Treats Recipe
Step 1: Carefully Separate the Oreos
Start by gently twisting off the tops of all 12 Oreos. I usually do this slowly and wiggle the cookie side to keep the creamy filling intact on the bottom half — this is important because that’s the side we’ll decorate. Don’t toss the tops; you can use them for another treat or crush them as a topping later!
Step 2: Arrange on a Cookie Sheet
Place the Oreo halves with the cream facing up on a cookie sheet or flat tray. This keeps everything steady when piping and placing candies, ensuring your “eyeballs” don’t wobble and lose their shape while you’re decorating.
Step 3: Melt the Red Candy Chips
Pop about ¼ cup of red candy melting chips into the microwave for 30 seconds, then stir. Repeat in 15-second bursts, stirring each time until the candy is smooth and glossy. This melted candy will be the “bloodshot” veins on your eyeballs, so make sure it’s fluid but not overheated.
Step 4: Pipe the Bloodshot Veins
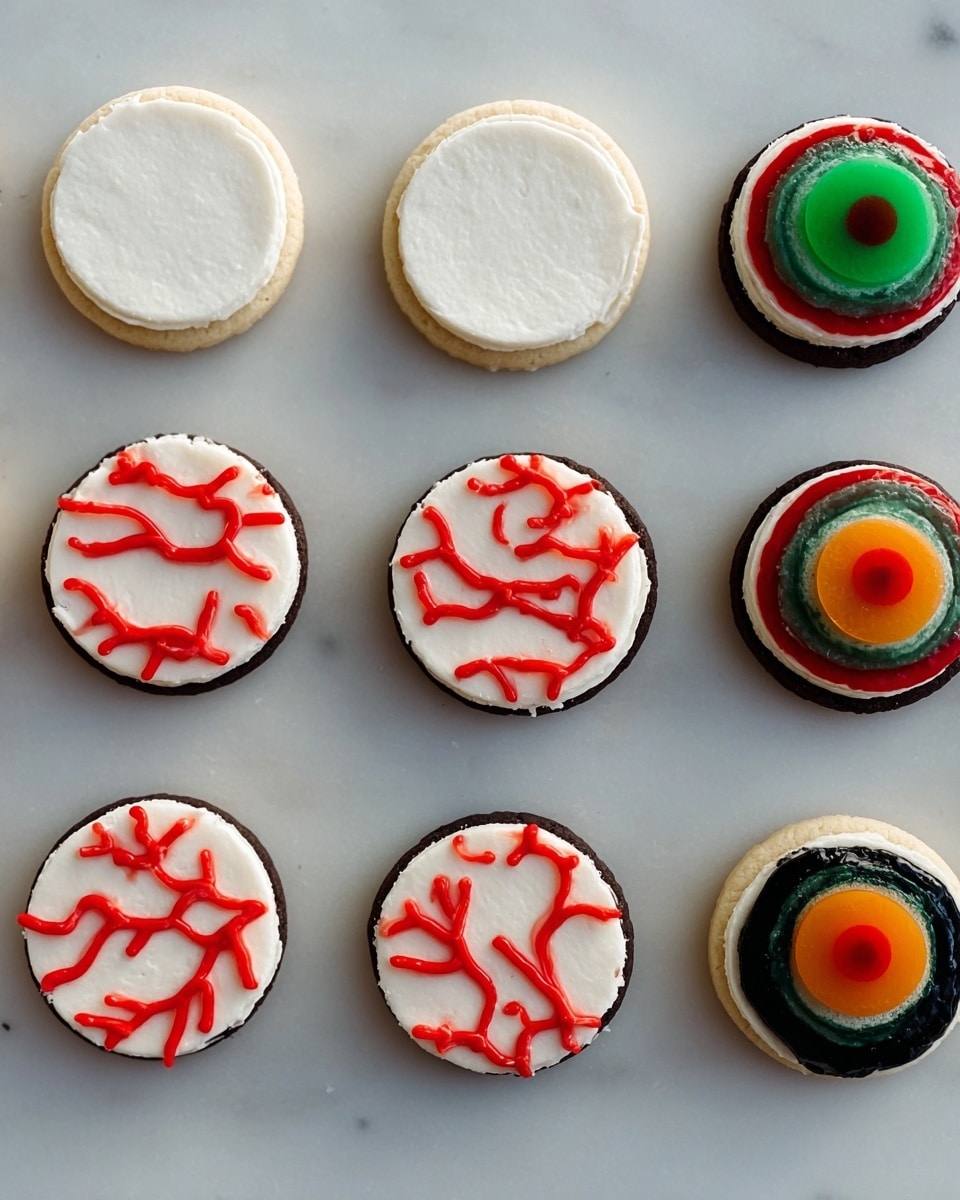
Transfer the melted red candy into a zippered sandwich bag and snip off a tiny tip — you want very thin piping lines. Now, pipe tiny zigzag vein lines radiating from the center of each Oreo cream to the edge, mimicking the look of bloodshot eyes. Don’t worry if they’re not perfect; uneven lines add to the creepy vibe!
Step 5: Add the Iris
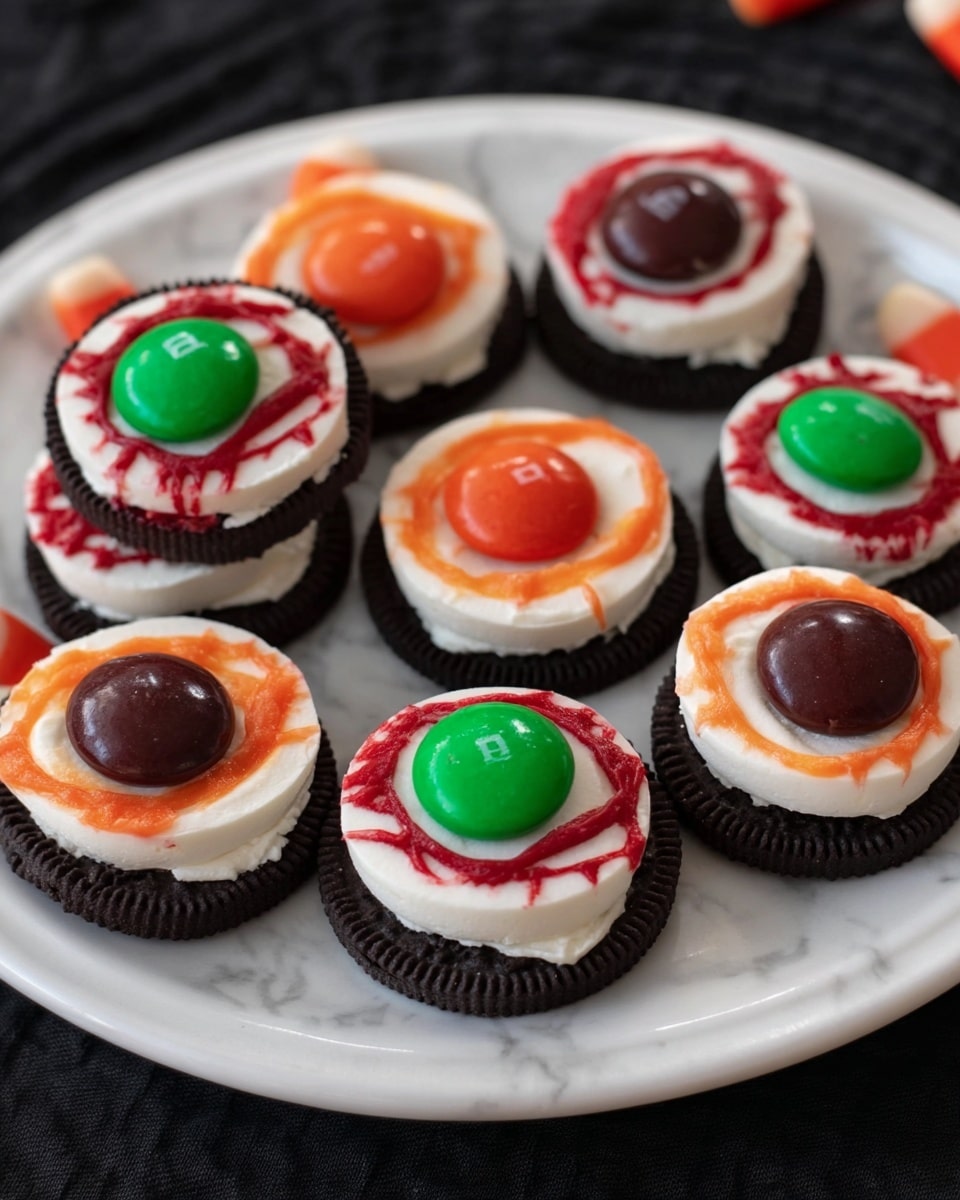
Place one Life Saver gummy smack in the middle of each Oreo cream. These colorful gummies act as the “iris” and add a chewy texture that contrasts perfectly with the crunchy cookie.
Step 6: Create the Pupil Using Chocolate
Using a tiny dab of the red melted candy (just like glue), carefully place a chocolate chip flat side up right in the center of the gummy Life Saver. This forms the creepy little pupil that completes the eyeball effect. It also feels really satisfying when everything sticks perfectly!
Step 7: Chill and Set
Pop the whole tray in the refrigerator for about 10 minutes. This quick chill firms up the red candy veins and secures the chocolate chip pupil in place, so your Oreo eyeballs stay perfect until you’re ready to serve them.
Pro Tips for Making Oreo Eyeballs Halloween Treats Recipe
- Keep Oreos cool: If your kitchen is warm, store Oreos in the fridge briefly before starting; this helps the red candy dry faster and prevents melting during assembly.
- Piping bag hack: If you don’t have a zippered bag, use a small plastic sandwich bag with scissors — just be sure to cut a tiny hole to control the candy flow.
- Use fresh candies: I learned the hard way that gummy candies lose their freshness and stickiness if left out — use fresh Life Savers for best grip and texture.
- Don’t rush cooling: Let the finished eyeballs chill long enough — they’ll hold together better and be easier to transport.
How to Serve Oreo Eyeballs Halloween Treats Recipe
Garnishes
I usually keep garnishes minimal because these eyeballs speak for themselves visually. But if I’m feeling extra festive, I dust the serving plate lightly with edible glitter or place the eyeballs on a bed of torn blackberry or raspberry jam “blood” for a dramatic effect. The glossy jam makes the creepy factor pop!
Side Dishes
These Oreo eyeballs shine as standalone treats but pair wonderfully with pumpkin spice cookies, mini caramel apples, or even savory snacks like popcorn mixed with candy corn for balance. I love creating a spooky snack platter to keep Halloween vibes alive!
Creative Ways to Present
For a fun twist, try serving the Oreo eyeballs in clear glass jars decorated with cobweb stickers or on black cake stands surrounded by dry ice for a spooky smoky effect. Another hit is making mini “eye bowls” by hollowing out small oranges and filling them with eyeballs — it’s a fun interactive presentation that guests adore.
Make Ahead and Storage
Storing Leftovers
I store leftover Oreo eyeballs in an airtight container in the fridge, laid out in a single layer so they don’t stick together. They keep well for up to 3 days — though in my house, they rarely last that long!
Freezing
I haven’t tried freezing these personally because the gummy life saver texture changes with freezing and thawing, and the red candy veins sometimes crack. For best results, I recommend enjoying them fresh or within a few days of making.
Reheating
No reheating needed here! These are best served chilled or at room temperature. If the candy veins feel a bit sticky after storage, a few minutes at room temp will help them regain firmness.
FAQs
-
Can I use other types of cookies instead of Oreos for this recipe?
Absolutely! While Oreos make the classic eyeball base thanks to their creamy filling and shape, you can experiment with other sandwich cookies that have a cream center. Just make sure the cookie is sturdy enough to hold the decorations without crumbling.
-
What if I don’t have red candy melts? Can I substitute something else?
If you don’t have red candy melts, you can try melting white chocolate with a small amount of red food coloring gel. Just be sure to use gel coloring as liquid can affect the chocolate’s consistency. Alternatively, red decorating gel or icing tubes can work for drawing the veins.
-
How do I prevent the melted candy from hardening too fast when piping?
Keep the melted candy warm by microwaving in short bursts if needed, and work quickly while piping. If it starts to harden, just reheat gently and restir. Also, prepping your piping bag right before you start helps avoid clogs.
-
Can children help make these Oreo eyeballs?
Definitely! Kids will love assembling and decorating these. Just handle the melting parts yourself or supervise carefully, and let kids do the fun part of piping veins and placing gummies and chocolate chips.
Final Thoughts
Honestly, the Oreo Eyeballs Halloween Treats Recipe has become my go-to for Halloween snacks because it’s quick, fun, and a total crowd-pleaser. Every year, I look forward to pulling out this recipe, especially since the little details — like the bloodshot veins and gummy irises — always earn appreciation and giggles. If you want a recipe that’s easy, visually impressive, and downright delicious, I can’t recommend this one enough. Give it a try for your next Halloween bash or just a spooky snack night — you’ll thank me later!
Print
Oreo Eyeballs Halloween Treats Recipe
- Prep Time: 15 minutes
- Cook Time: 10 minutes
- Total Time: 25 minutes
- Yield: 12 servings
- Category: Dessert
- Method: No-Cook
- Cuisine: American
Description
Spooky and fun Oreo Eyeballs Halloween Treats that are easy to make with a few simple ingredients. Perfect for Halloween parties or themed gatherings, these treats combine Oreos, colorful candy melts, and gummies to create creepy, bloodshot eyes that delight kids and adults alike.
Ingredients
Eyeball Components
- 12 Oreos
- 12 Life Saver Gummies
- 12 Chocolate Chips
- 1/4 cup Red Candy Melting Chips
Instructions
- Prepare Oreos: Carefully remove the tops of the Oreos and save them for use in another treat. Place the Oreo bottoms on a cookie sheet to work with.
- Melt Red Candy: Heat the red candy melting chips in the microwave for 30 seconds, then stir. Repeat heating in short intervals until fully melted and smooth.
- Pipe Bloodshot Lines: Transfer the melted red candy to a zippered sandwich bag, clip a tiny tip, and pipe thin zig zag lines from the center to the edges of each Oreo to simulate bloodshot eyes.
- Add Iris: Place one Life Saver gummy in the center of each Oreo as the iris of the eyeball.
- Attach Pupils: Pipe a small dot of red melted candy onto the center of each gummy to act as glue, then press a chocolate chip (flat side up) onto the candy to create the pupil.
- Set the Eyeballs: Put the assembled eyeballs in the refrigerator and chill for 10 minutes to allow the candy to set completely.
Notes
- Use different colored Life Saver gummies to create unique eye variations.
- Be careful when clipping the piping tip to avoid large blobs of candy.
- If candy melts get too thick, add a small amount of vegetable oil to thin before piping.
- Store completed eyeballs in the refrigerator until serving to keep candy firm.
- Save Oreo tops for a crumble topping or mix into other desserts.
Nutrition
- Serving Size: 1 eyeball (1 Oreo with toppings)
- Calories: 120 kcal
- Sugar: 15 g
- Sodium: 90 mg
- Fat: 5 g
- Saturated Fat: 2.5 g
- Unsaturated Fat: 2 g
- Trans Fat: 0 g
- Carbohydrates: 20 g
- Fiber: 1 g
- Protein: 1 g
- Cholesterol: 0 mg

