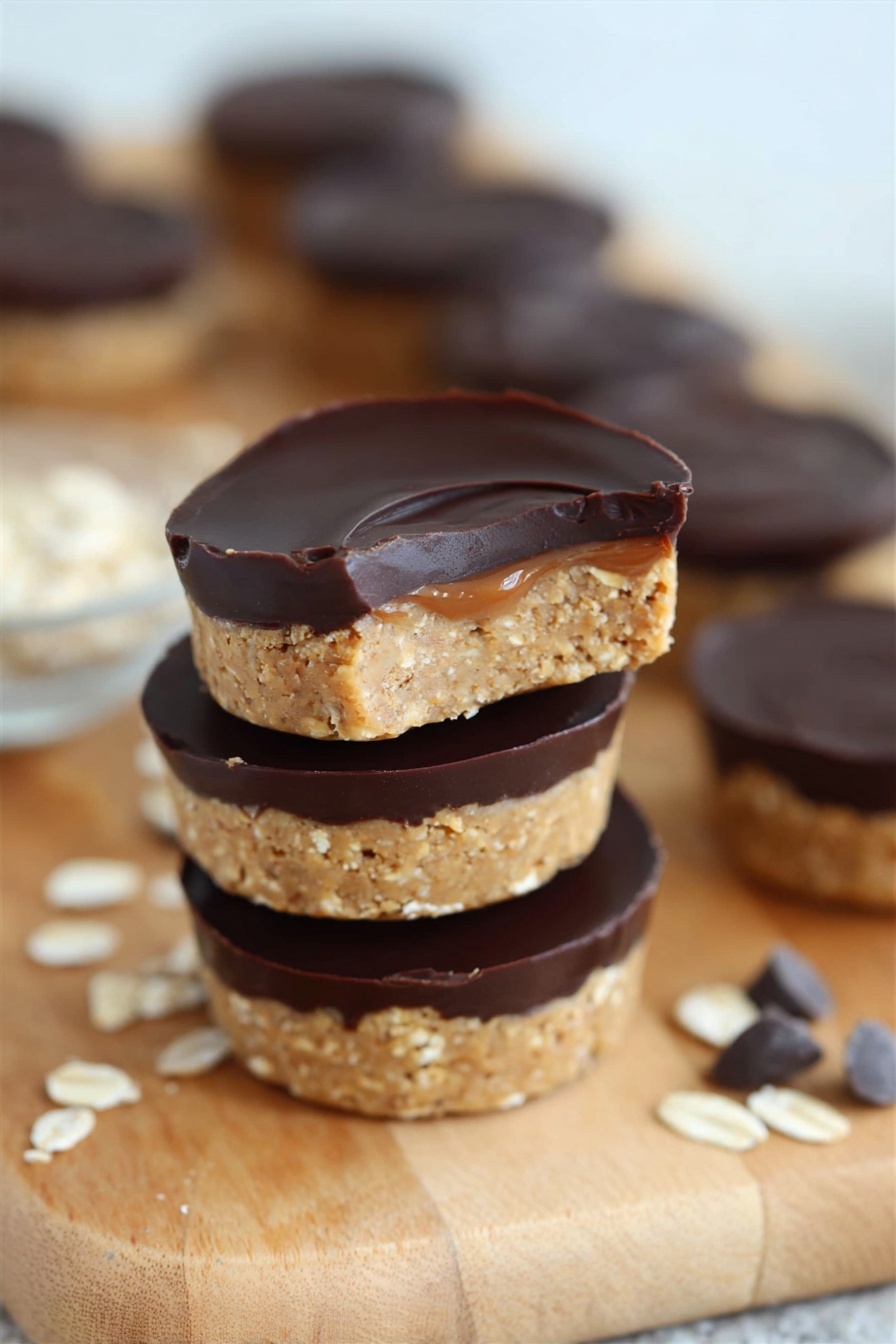
No Bake Peanut Butter Oat Cups Recipe
If you’re anything like me, the idea of whipping up a delicious, wholesome treat without turning on the oven is pure magic. That’s exactly why I’m so excited to share this No Bake Peanut Butter Oat Cups Recipe with you. These cups are creamy, chocolatey, and packed with that nutty goodness we all crave, plus they’re super simple to make. Whether you need a quick snack, something to grab on the go, or a healthier dessert option, this recipe is going to be your new go-to.
Why This Recipe Works
- No Baking Needed: Perfect for when you want a treat but dread heating up your kitchen.
- Simple Ingredients: Just a handful of pantry staples that combine into a wholesome snack.
- Customizable Texture: Thick, chewy oat flour and creamy peanut butter create the ideal balance.
- Rich Chocolate Layer: Adds indulgence without overpowering the natural peanut flavor.

Ingredients & Why They Work
This No Bake Peanut Butter Oat Cups Recipe is all about simple, wholesome ingredients that play off each other beautifully. Each component has a job — the peanut butter brings creaminess and protein, while the oat flour provides heartiness and chew. The maple syrup sweetens gently, and the chocolate adds a little indulgent crispness on top.
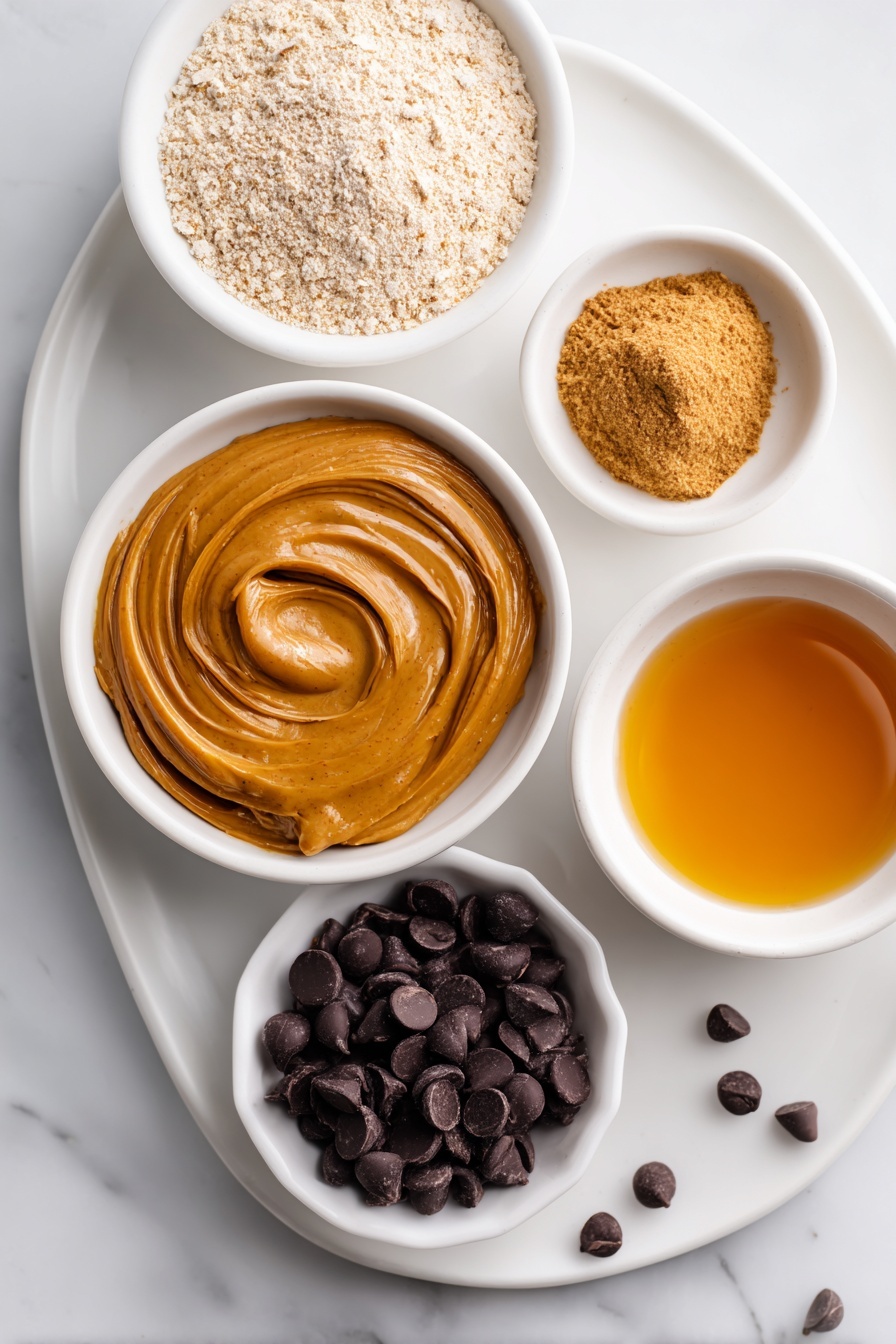
- Peanut Butter: Use a natural or creamy version for that smooth, rich texture and protein punch.
- Rolled Oats (processed to oat flour): Grinding the oats fine keeps the texture smooth yet substantial — no gritty bites here!
- Maple Syrup: Adds natural sweetness and helps bind the mixture together without artificial sugars.
- Chocolate Chips: Melts perfectly for the topping and adds tasty contrast to the peanut butter base.
- Coconut Oil (optional): Helps the chocolate layer set beautifully with a silky finish.
Tweak to Your Taste
One of my favorite things about this No Bake Peanut Butter Oat Cups Recipe is how easy it is to tweak it based on what you have or crave. I often mix it up with different nut butters or even throw in extras like dried fruits or seeds to make it my own.
- Variation: I once added pumpkin puree and a bit of pumpkin spice during fall — it was like peanut butter meets autumn in every bite, and honestly, it disappeared faster than I could snap a photo.
- Dietary Mods: Swap peanut butter for almond or sunflower seed butter if you’re avoiding peanuts.
- TexturePlay: If you like things less dense, add a couple tablespoons of pumpkin or applesauce for moisture.
Step-by-Step: How I Make No Bake Peanut Butter Oat Cups Recipe
Step 1: Blend The Oats Into Oat Flour
Grab your food processor or high-speed blender and pulse the rolled oats until they reach a fine, flour-like consistency. This step really makes a difference because it keeps your cups smooth and chewy without that coarse oat texture. I’ve tried skipping this and trust me — it’s worth the tiny bit of extra effort.
Step 2: Soften and Mix Peanut Butter & Maple Syrup
In a microwave-safe bowl, heat the peanut butter and maple syrup together for about 40 to 60 seconds. This melting step helps them blend into one luscious mixture without lumps. Stir really well until smooth and glossy — if you skip this, the oats won’t bind as nicely.
Step 3: Combine Everything Into a Thick Dough
Slowly add your oat flour to the peanut butter mixture and stir with a sturdy spoon or spatula. The mixture should come together into a thick, moldable dough. It might take some elbow grease — that’s normal! If it feels too dry or crumbly, just add a teaspoon of maple syrup or peanut butter at a time until it sticks.
Step 4: Prep Your Pan and Press The Mixture
Line a muffin tin with cupcake liners or use a silicone muffin pan for easy removal (my personal fave!). Scoop your mixture evenly into each cup and press down with your fingers to form a firm base. This step’s super satisfying — and so fun, it’s almost like playing with edible clay.
Step 5: Melt Chocolate and Top Your Cups
In a small microwave-safe bowl, melt your chocolate chips with the coconut oil (if using) in 30-second intervals, stirring in between. Pour a smooth layer of melted chocolate over each cup, smoothing the top with the back of a spoon. I love to sprinkle a little flaky sea salt or mini chocolate chips on top – trust me, that salty-sweet combo is a game-changer.
Step 6: Chill and Enjoy
Pop your pan into the fridge for at least 2 to 3 hours to let those cups firm up properly. Once set, gently remove them from the pan and store in an airtight container in the fridge. They’re best enjoyed chilled but bring them out a little early if you want a softer bite.
Pro Tips for Making No Bake Peanut Butter Oat Cups Recipe
- Choose the Right Peanut Butter: Natural peanut butter works best for flavor and texture, but if it’s too thick, give it a quick warm-up before blending.
- Don’t Skip Oat Flour: Using finely processed oats keeps your cups from being gritty — it’s a small step that makes a big difference.
- Press Firmly: Make sure to pack the mixture tightly into the cups to help them hold shape after chilling.
- Be Patient With Setting: Resist the urge to dig in too soon; chilling time is key for a perfect set and texture.
How to Serve No Bake Peanut Butter Oat Cups Recipe
Garnishes
I love topping mine with a sprinkle of flaky sea salt — it just elevates the chocolate and peanut butter combo beautifully. Sometimes I add crushed roasted peanuts or even some mini rainbow sprinkles if I’m serving these to kids for a fun twist. Tiny toasted coconut flakes can add an unexpected crunch and compliment the flavors too.
Side Dishes
For a complete snack, pairing these cups with fresh fruit like apple slices or banana works really well. I’ve also enjoyed them alongside a cup of coffee or chai latte — it feels like a little café moment right in my kitchen.
Creative Ways to Present
For a party or gift, I like to individually wrap each cup in parchment paper tied with twine. This makes a lovely, rustic presentation that’s perfect for gifting or bringing to potlucks. Layering these cups in a pretty box with tissue paper makes for a stunning homemade treat display, too.
Make Ahead and Storage
Storing Leftovers
Since these no bake cups contain natural ingredients and no preservatives, I always keep them in an airtight container in the fridge. They last wonderfully up to 5 days, and honestly, they rarely hang around that long in my house! Kept cold, they stay firm with that perfect chewy texture.
Freezing
Freezing works great if you want to prep ahead. Just pop the cups into an airtight container or freezer bag and freeze for up to 2 months. When you’re ready, thaw in the fridge overnight — they soften nicely without losing their texture or flavor.
Reheating
I don’t actually reheat these, since I love them chilled or just at room temperature. If you do want them softer, leave them out on the counter for 10-15 minutes or warm slightly (5-7 seconds) in the microwave just until they’re the texture you like.
FAQs
-
Can I use crunchy peanut butter?
Absolutely! Using crunchy peanut butter will add a bit more texture to the cups, which some people really enjoy. Just keep in mind the oat flour will keep things fairly smooth overall.
-
What if I don’t have a food processor to make oat flour?
Your blender might work just fine if it’s powerful. If not, you can buy oat flour pre-made or use finely ground quick oats, but the texture might be slightly different. Processing the oats well helps with the smoothness of the cups.
-
Is there a substitute for maple syrup?
You can swap maple syrup for honey, agave syrup, or even brown rice syrup. Just remember these might change the flavor slightly and affect how the mixture binds, so add gradually and adjust as needed.
-
Can I make this recipe nut-free?
Sure! Swap peanut butter for your favorite seed butter, like sunflower or tahini, and you’ll have a nut-free version that’s just as tasty.
-
How long do these oat cups last in the fridge?
They stay fresh and delicious for up to 5 days when stored in an airtight container in the refrigerator. After that, they can start drying out or lose their chewy texture.
Final Thoughts
This No Bake Peanut Butter Oat Cups Recipe really feels like a little secret weapon I keep in my snack arsenal. It’s fast, forgiving, and oh-so-satisfying. I hope you enjoy making it as much as I do — it’s a perfect blend of comfort and health, and so handy to have ready when a peanut butter craving strikes. Give it a try, and let me know how you customize it to make it your own!
Print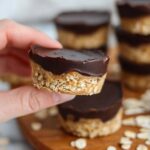
No Bake Peanut Butter Oat Cups Recipe
- Prep Time: 10 minutes
- Cook Time: 0 minutes
- Total Time: 3 hours 10 minutes
- Yield: 12 servings
- Category: Snack
- Method: No-Cook
- Cuisine: American
- Diet: Vegetarian
Description
These No Bake Peanut Butter Oat Cups are a delicious, easy-to-make snack or dessert that combines creamy peanut butter, wholesome oats, and rich chocolate. Perfect for a quick energy boost or a sweet treat without turning on the oven.
Ingredients
Main Ingredients
- 1.5 cups peanut butter
- 1.5 cups rolled oats, processed finely in a food processor to make oat flour
- 1/4 cup maple syrup
- 1 cup chocolate chips
- 1 tsp coconut oil, optional
Instructions
- Prepare oat flour: Blend rolled oats in a high-speed blender or food processor until they become a fine oat flour.
- Mix peanut butter and syrup: In a medium microwave-safe bowl, combine peanut butter and maple syrup. Microwave for 40-60 seconds, then stir thoroughly until fully combined.
- Combine oat flour: Gradually add the blended oat flour into the peanut butter mixture, mixing well. The mixture should be thick but moldable. If too dry, add maple syrup or peanut butter one teaspoon at a time. Optionally, add 1/4 to 1/3 cup pumpkin puree for extra moisture.
- Prepare muffin pan: Line a muffin pan with cupcake liners or use a silicone muffin pan for easy removal.
- Shape the cups: Scoop the peanut butter oat mixture evenly into muffin cups and press down firmly with your fingers to shape the cups.
- Melt chocolate: In a microwave-safe small bowl, combine chocolate chips and coconut oil. Heat in 30-second increments, stirring until smooth and fully melted.
- Top with chocolate: Pour a layer of melted chocolate over each cup and smooth the top with the back of a spoon. Optionally, sprinkle flaky salt, sprinkles, or mini chocolate chips on top before the chocolate sets.
- Chill and set: Refrigerate the cups for 2-3 hours until fully set.
- Serve and store: Carefully remove the cups from the muffin pan or liners. Store in an airtight container in the refrigerator for up to 5 days.
Notes
- For a pumpkin flavored variation, add 1/3 cup pumpkin puree and 1 1/2 tsp pumpkin spice to the mixture.
- If mixture is too dry, add extra maple syrup or peanut butter a teaspoon at a time to achieve moldable consistency.
- Use silicone muffin pans or liners for easier removal of the cups.
- Store these no bake cups in the refrigerator due to fresh ingredients like maple syrup.
Nutrition
- Serving Size: 1 cup
- Calories: 220 kcal
- Sugar: 10 g
- Sodium: 95 mg
- Fat: 16 g
- Saturated Fat: 4 g
- Unsaturated Fat: 11 g
- Trans Fat: 0 g
- Carbohydrates: 16 g
- Fiber: 3 g
- Protein: 6 g
- Cholesterol: 0 mg


