Mummy Pretzels with Halloween Pudding Cups Recipe
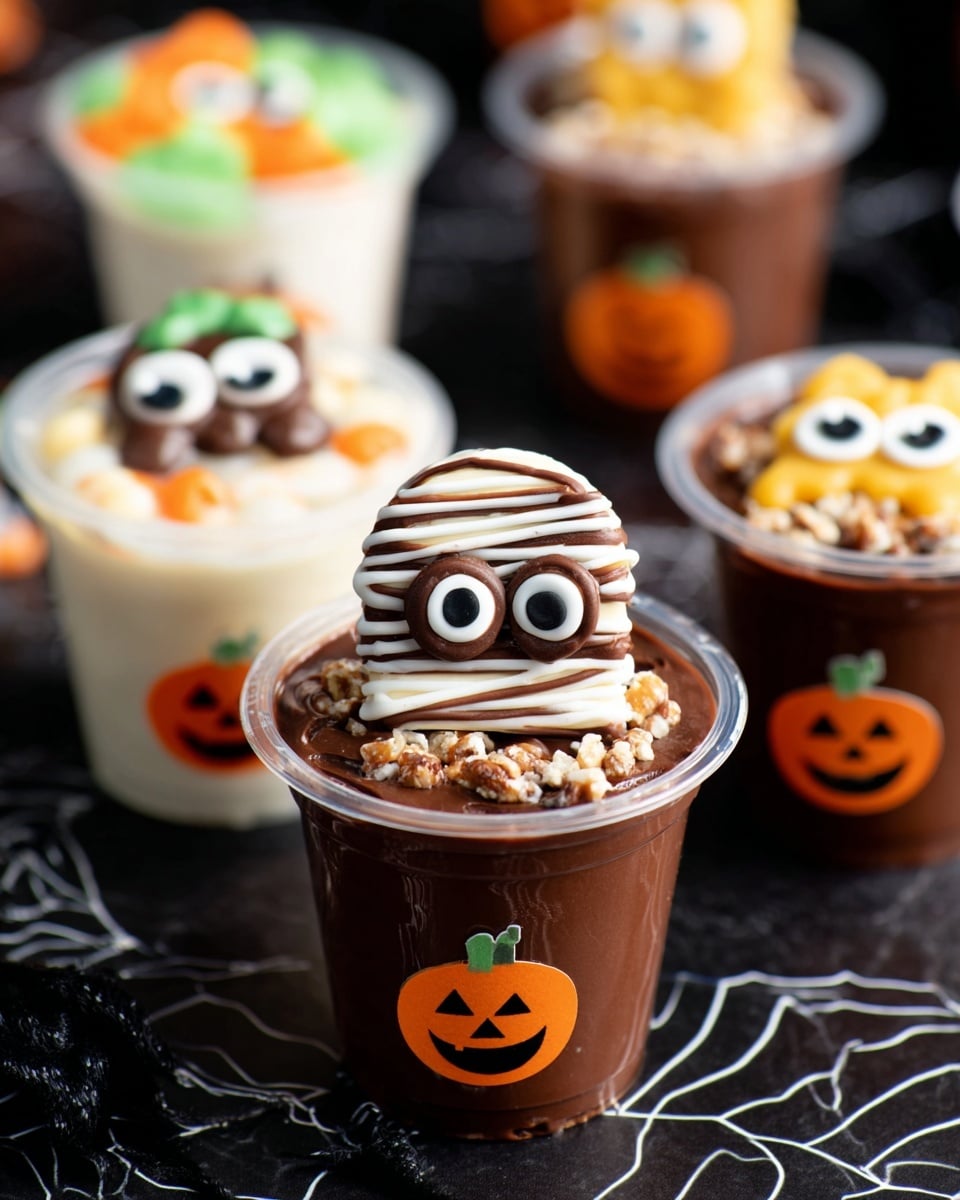
If you’re looking for a fun and festive treat that is just as delightful to make as it is to eat, you’re going to love this Mummy Pretzels with Halloween Pudding Cups Recipe. Grab your favorite spooky playlist and let’s get into it—this recipe is not just cute, but super easy and guaranteed to be the star of any Halloween gathering!
Why This Recipe Works
- Visual Appeal: The mummy pretzels are adorable and eye-catching, perfect for spooky celebrations.
- Flavor Combos: Sweet candy melts paired with crunchy pretzels and creamy pudding makes every bite exciting.
- Kid-Friendly: This recipe is super simple, safe, and hands-on—kids love helping with the dunking and decorating.
- Quick & No-Bake: Ready in about 15 minutes with no oven needed, which means minimal fuss and maximum fun.

Ingredients & Why They Work
These ingredients come together to balance sweetness, texture, and vibrant Halloween colors. When shopping, look for good-quality candy melts that melt smoothly, and snag some crunchy pretzels that are just the right size for dipping.
- Pretzels: They provide the perfect crunchy base and a savory contrast to the sweet coating.
- White, orange, and green candy melts: These add pops of Halloween color and melt easily for dipping and drizzling.
- Chocolate candy melts: Used for those mummy bandage details and to glue on candy eyeballs.
- Candy eyeballs: Super cute and make these pretzels instantly recognizable as little mummies.
- Snack Pack vanilla and chocolate puddings: Convenient, creamy bases to build your spooky pudding cups on.
- Apple (diced): Adds freshness and crunch to vanilla pudding cups.
- Crushed pretzels: Great for sprinkling on top to add texture and a salty touch.
- Peter Pan peanut butter: Just a touch adds richness and a hint of savory flavor that pairs beautifully with the sweet pudding.
- Halloween stickers: Fun to decorate the pudding cups and amp up the festive vibe!
Tweak to Your Taste
I love that this Mummy Pretzels with Halloween Pudding Cups Recipe is a total playground for creativity, so feel free to make it your own! Here are some of my favorite twists to inspire you:
- Variation: I once swapped peanut butter for almond butter in the pudding and it added a lovely nutty depth that’s great if you’re cooking for peanut allergies.
- Dietary Tip: Using dairy-free puddings and vegan candy melts means this recipe can easily be made vegan-friendly, a win for parties with diverse dietary needs.
- Seasonal Spin: I sometimes add orange zest to the vanilla pudding for an extra zing that pairs perfectly with the fall atmosphere.
- Difficulty Level: If you’re short on time, skip the drizzling step on the pretzels and just dip – they’re just as tasty and cute!
Step-by-Step: How I Make Mummy Pretzels with Halloween Pudding Cups Recipe
Step 1: Melt All Your Candy Melts
The first thing I do is melt the white, orange, green, and chocolate candy melts in separate bowls. I follow the instructions on the package carefully—usually it means melting in short bursts in the microwave and stirring in between. The key here is patience. Stir well so the candy melts are smooth and glossy. This helps the coating stick to the pretzels perfectly and keeps your hands cleaner during dipping.
Step 2: Dip Pretzels and Let Dry
Next, line a baking sheet with parchment or wax paper. I like to have everything prepped because when you start dipping, it moves quickly. Grab a pretzel, dip it in one of the candy melts colors, and shake off the excess. Then, place it on the lined sheet. Keep going until you have a colorful mix of pretzel mummies. Set them aside and let the candy harden for about 15 minutes. If you notice the melted candy starts to firm up in the bowls, just rewarm gently to keep it smooth.
Step 3: Add Mummy Details
Here’s the fun part—the mummy “bandages”! Using a fork, drizzle different colors of melted candy melts over each dipped pretzel to create that wrapped look. Then, carefully stick on candy eyeballs. Sometimes, the eyes don’t stick by themselves, so I use a tiny dab of melted chocolate as glue. Once decorated, set them back on the parchment and let everything set fully for another 15 minutes.
Step 4: Prepare Festive Pudding Cups
While your pretzels are setting, this is a perfect time to personalize those pudding cups. Add Halloween stickers to the outside of each pudding container—it’s a simple step but adds big charm, especially if you have little helpers. For the chocolate pudding cups, stir in a teaspoon of peanut butter and sprinkle in some crushed pretzels for texture. For the vanilla ones, fold in diced apples for a fresh crunch.
Step 5: Assemble and Serve
To finish, place a mummy pretzel on top of each pudding cup. For extra flair and crunch, sprinkle crushed pretzels over the chocolate pudding and a few extra diced apples over the vanilla cups. Trust me, this is where the little touches really shine and impress your guests!
Pro Tips for Making Mummy Pretzels with Halloween Pudding Cups Recipe
- Candy Melts Handling: Don’t overheat the candy melts; heat in short bursts and stir well to prevent burning.
- Pretzel Size: Medium-sized pretzels work best—they hold the candy coating without getting soggy or too heavy.
- Eye Placement: Use tweezers or a toothpick to position candy eyeballs precisely without smudging the candy coating.
- Storage Tip: Store your finished mummy pretzels in a single layer at room temperature to keep them from sweating or melting prematurely.
How to Serve Mummy Pretzels with Halloween Pudding Cups Recipe
Garnishes
When I serve these, I like to add a sprinkle of crushed pretzels or diced apples on top of the pudding cups, giving them a nice rustic finish. Sometimes I toss a few festive sprinkles or edible glitter to amp up the Halloween spirit — because why not add some sparkle to your table?
Side Dishes
These treats pair wonderfully with light finger foods like mini sandwiches or fruit kabobs for a full party spread. If you want to keep the theme going, I’ve even set out bowls of candy corn or pumpkin-shaped cheese crackers alongside the pudding cups.
Creative Ways to Present
One Halloween, I arranged the pudding cups on a platter lined with fake spider webs and scattered some plastic spiders around — the kids went nuts! You could also serve the mummy pretzels stuck into mini pumpkins or styrofoam blocks covered in tissue paper for an eerie display. The key is fun and festive presentation that makes the whole table feel magical.
Make Ahead and Storage
Storing Leftovers
If you have leftovers (and honestly, will you?), store the mummy pretzels in an airtight container at room temperature so the candy coating stays crisp. The pudding cups should be refrigerated and eaten within 2 days for best texture and freshness.
Freezing
Freezing these isn’t something I recommend since pudding texture can change and pretzel coatings might get soggy. If you want to prep in advance, I suggest making the pretzels a day ahead and keeping the pudding cups refrigerated separately.
Reheating
No need to reheat! These treats are best enjoyed chilled or at room temperature. Simply bring the pudding cups out of the fridge 10 minutes before serving so they soften slightly.
FAQs
-
Can I make the mummy pretzels without candy melts?
While candy melts give the best smooth and colorful coating, you could try melting white chocolate or colored white chocolate chips instead. Just keep in mind the melting point and texture might be a bit different, and the coating may not harden as firmly.
-
How long do the mummy pretzels stay fresh?
Stored in an airtight container at room temperature, they typically stay fresh and crunchy for about 3-4 days. Try to keep them away from humidity and heat that might cause the candy coating to melt or sweat.
-
Can I use homemade pudding instead of store-bought Snack Packs?
Absolutely! Homemade pudding works great and lets you customize flavors and sweetness. Just make sure it’s chilled well before mixing in the other ingredients and assembling.
-
Are there allergy-friendly alternatives for peanut butter in the pudding?
Yes! You can swap peanut butter with sunflower seed butter or cookie butter to keep it allergy-friendly without sacrificing that creamy richness.
-
How do I prevent the candy melts from seizing while melting?
Make sure the bowls and utensils are completely dry—any moisture can cause candy melts to seize and become clumpy. Also, melt them in short bursts, stirring frequently.
Final Thoughts
This Mummy Pretzels with Halloween Pudding Cups Recipe holds a special place in my heart because it brings so much joy to the kitchen and the table. It’s a recipe I love making with my family—it’s simple, colorful, and sparks creativity. Plus, who can resist those cute little mummy faces? I’m confident once you try it, these treats will become one of your Halloween favorites too. So grab those pretzels, melt some candy, and let’s get spooky delicious!
Print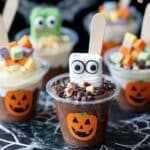
Mummy Pretzels with Halloween Pudding Cups Recipe
- Prep Time: 15 minutes
- Cook Time: 15 minutes
- Total Time: 30 minutes
- Yield: 8 servings
- Category: Snack
- Method: No-Cook
- Cuisine: American
Description
These festive Mummy Pretzels are a fun and spooky Halloween treat featuring pretzels dipped in colorful candy melts, decorated with candy eyeballs, and paired with delicious pudding cups topped with peanut butter, crushed pretzels, and diced apples. Perfect for a party or an easy Halloween snack.
Ingredients
For the Mummy Pretzels:
- 3-4 cups pretzels
- 1 cup white candy melts
- 1 cup orange candy melts
- 1 cup green candy melts
- 1/2 cup chocolate candy melts
- Candy eyeballs
- Bowls to melt the candy in
For the Pudding Cups:
- 4 Snack Pack vanilla puddings
- 4 Snack Pack chocolate puddings
- 1 apple, diced
- Crushed pretzels
- 4 tsp Peter Pan peanut butter
Other:
- Halloween stickers of your choice
Instructions
- Melt Candy Melts: Melt the white, orange, green, and chocolate candy melts in separate bowls following the instructions on the package to prepare them for dipping.
- Dip Pretzels: Line a baking sheet with parchment or wax paper. Dip the pretzels into the different colors of melted candy and place them on the lined baking sheet to set for 15 minutes.
- Decorate Pretzels: If the melted chocolate has hardened, re-melt it. Using a fork, drizzle different colors of melted chocolate over the set pretzels. Attach candy eyeballs using melted chocolate as glue if necessary. Let the pretzels set for another 15 minutes.
- Prepare Pudding Cups: Place Halloween stickers on the outside of each pudding cup. Add 1 teaspoon of peanut butter and some crushed pretzels into each chocolate pudding cup and mix to combine. Add 1/4 of the diced apple to each vanilla pudding cup and mix to combine.
- Assemble and Serve: Top each pudding cup with a mummy pretzel. Sprinkle crushed pretzels over the chocolate pudding cups and diced apples over the vanilla pudding cups for garnish.
Notes
- Use parchment or wax paper to prevent melted candy from sticking to the baking sheet.
- If candy melts harden before you finish decorating, reheat gently over low heat to avoid burning.
- Candy eyeballs can be substituted with small dots of white and black icing if unavailable.
- Snack Pack puddings can be substituted with homemade pudding if preferred.
- Store decorated pretzels in an airtight container at room temperature to maintain crispness.
Nutrition
- Serving Size: 1 serving
- Calories: 250 kcal
- Sugar: 20 g
- Sodium: 300 mg
- Fat: 12 g
- Saturated Fat: 7 g
- Unsaturated Fat: 4 g
- Trans Fat: 0 g
- Carbohydrates: 32 g
- Fiber: 1 g
- Protein: 4 g
- Cholesterol: 10 mg
