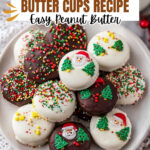
Homemade Peanut Butter Cups Recipe
If you’ve ever craved the perfect sweet and salty treat but wanted to skip the store-bought stuff loaded with mystery ingredients, then this Homemade Peanut Butter Cups Recipe is your new best friend in the kitchen! Trust me, once you try these, you’ll never look back. They’re creamy, chocolatey, and just the right balance of peanut buttery goodness. Plus, they’re way easier to make than you’d think — perfect for gifting or just sneaking a few when no one’s looking.
Why This Recipe Works
- Simple Ingredients: Uses pantry staples so you can whip up these treats anytime.
- Rich, Creamy Texture: The combination of creamy peanut butter and butter makes the filling perfectly smooth but not too runny.
- Customizable Chocolate Coating: Using almond bark melts easily and gives you a shiny, sturdy shell.
- Quick Set Time: Ready to enjoy in just about an hour, great for last-minute cravings or gifts.

Ingredients & Why They Work
The ingredients in this Homemade Peanut Butter Cups Recipe are straightforward but perfectly balanced to give you that nostalgic candy shop flavor without any fuss. Here’s why each one is essential—and some tips for picking the best versions.
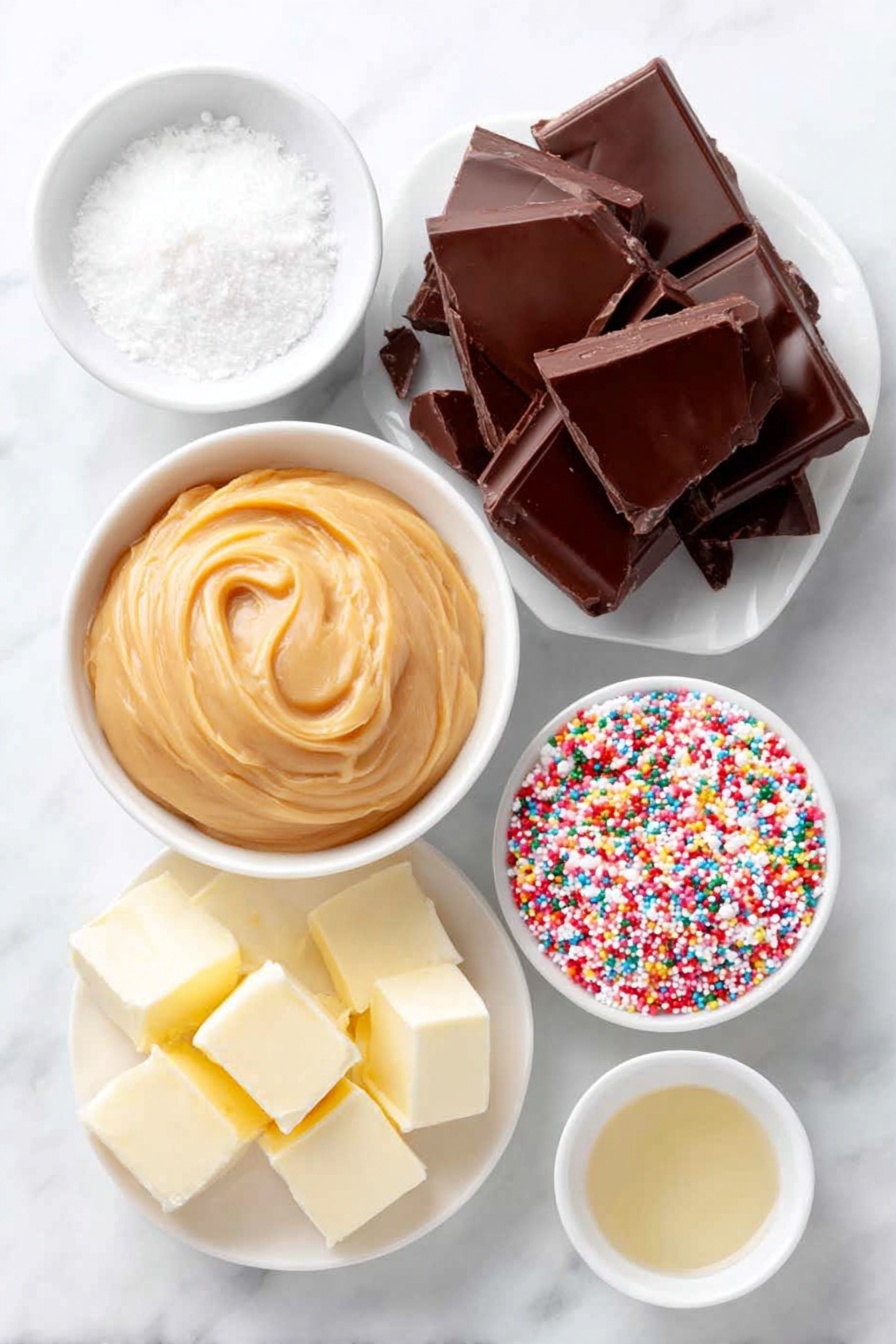
- Creamy peanut butter: Use a good-quality, smooth peanut butter for that melt-in-your-mouth texture. Avoid natural varieties that separate unless you stir thoroughly.
- Unsalted butter: Adds richness and creaminess to the filling while controlling the salt level.
- Vanilla extract: Just a touch elevates the flavor, making the peanut butter mixture taste more rounded and sweet.
- Confectioners sugar: Makes the filling sweet and gives it structure without graininess—don’t swap with regular granulated sugar.
- Chocolate almond bark or vanilla almond bark: The secret to that crisp shell! It melts smoothly and hardens nicely without tempering chocolate.
- Sprinkles (optional): For festive fun or that little pop of texture on top.
Tweak to Your Taste
One of the best things about making homemade peanut butter cups is how easy it is to play around with flavors and textures! I love mixing things up here and there, so feel free to customize this recipe.
- Crunchy peanut butter: If you’re into a little crunch, swap creamy for crunchy peanut butter to add texture to the filling—I tried it, and it’s a fun twist!
- Different nut butters: Almond or cashew butter works beautifully if peanut allergies are a concern or you’re just feeling adventurous.
- Dark chocolate coating: Try bittersweet chocolate instead of almond bark for a richer, less sweet shell.
- Salt sprinkle topping: A pinch of flaky sea salt on top after pouring chocolate instantly amps up the flavor contrast.
Step-by-Step: How I Make Homemade Peanut Butter Cups Recipe
Step 1: Prepare Your Supplies and Liner Up
Start by lining a standard muffin pan with 18 cupcake liners. This makes cleanup easier, keeps the cups together without sticking, and gives them that perfect candy shape. Pro tip: I like to use white or light-colored liners so the chocolate color pops beautifully.
Step 2: Cream the Peanut Butter Filling
In a large bowl, use your mixer to blend the peanut butter and room temperature butter until silky smooth. Add in the vanilla extract for that lovely hint of warmth, then mix in the confectioners sugar until fully combined. The mixture will be thick and a bit crumbly—don’t worry, that’s exactly what you want!
Step 3: Melt the Almond Bark
Melt the almond bark in a microwave-safe bowl in 30-second bursts, stirring in between to prevent scorching. You want it silky smooth and lump-free—this ensures a shiny finish and smooth coating on your peanut butter cups. If you don’t have a microwave, a double boiler works just as well.
Step 4: Create the Chocolate Base and Layers
Spoon a bit of the melted almond bark into the bottom of each lined cup and spread it slightly up the sides. This creates a firm shell that holds everything together. Then, scoop heaping tablespoons of the peanut butter mixture, roll each into a ball, and gently flatten them into thick discs. Carefully nestle each peanut butter disc on top of the chocolate base in the cups.
Step 5: Top with More Chocolate and Extras
Carefully spoon the remaining melted chocolate over the peanut butter discs, covering them completely. If you’re feeling festive, sprinkle some colorful sprinkles or crushed nuts right away so they stick as the chocolate hardens.
Step 6: Let Them Set
Let your peanut butter cups set at room temperature for about an hour—or speed things up by popping them in the refrigerator for 30 minutes. Once firm, they’re ready to be enjoyed or packaged as gifts.
Pro Tips for Making Homemade Peanut Butter Cups Recipe
- Room Temperature Butter: Make sure your butter is soft but not melted—this helps the filling blend smoothly without becoming oily.
- Avoid Overheating Chocolate: Stir frequently while melting to prevent the almond bark from burning and clumping.
- Firm but Tender Filling: Don’t over-sweeten; confectioners sugar gives a better texture than granulated.
- Use a Spoon or Silicone Spatula: For spreading chocolate inside the liners for a neat, even layer.
How to Serve Homemade Peanut Butter Cups Recipe

Garnishes
I usually keep things classic with a sprinkle of rainbow or holiday-themed sprinkles for special occasions—it adds a playful pop of color that makes these treats extra festive. If you’re feeling fancy, crushed peanuts or a tiny drizzle of white chocolate on top are gorgeous too!
Side Dishes
These peanut butter cups pair perfectly with a cold glass of milk (yes, that classic combo never fails!). For a grown-up twist, I’ve enjoyed them alongside a bold cup of black coffee or a scoop of vanilla ice cream for a decadent dessert.
Creative Ways to Present
When gifting or celebrating, I like to present these in mini cupcake boxes or decorative tins lined with parchment paper. Wrapping each cup in colorful foil or placing them in little clear treat bags tied with a ribbon instantly makes them look like a gourmet indulgence!
Make Ahead and Storage
Storing Leftovers
Once set, store these homemade peanut butter cups in an airtight container in the refrigerator. They stay fresh and tasty for up to two weeks—and trust me, they’ll disappear way before then!
Freezing
If you want to make a big batch ahead, freeze them in a sealed container with parchment paper between layers to prevent sticking. They keep beautifully for up to three months, which is perfect for planning holiday treats or emergency snacks.
Reheating
Because they’re best enjoyed chilled, I don’t typically reheat homemade peanut butter cups, but if they get a bit firm from the fridge, just let them sit at room temperature for 10 minutes before enjoying to soften slightly.
FAQs
-
Can I use natural peanut butter in this recipe?
You can, but natural peanut butter tends to separate and be more oily, which might change the texture of your filling. If you choose natural, stir it thoroughly before measuring and consider chilling the filling to help it set properly.
-
What can I use if I don’t have almond bark?
If you don’t have almond bark, melting high-quality chocolate chips with a little coconut oil or shortening works as a substitute. It won’t harden quite as firmly but still tastes delightful. Just be sure to chill the cups longer for a firmer shell.
-
How do I prevent the chocolate from melting on my hands?
Work quickly while the chocolate is melted, and if your hands get too warm, you can chill them briefly or use a spoon or silicone spatula to handle the chocolate and peanut butter discs instead of your fingers.
-
Can I make these peanut butter cups gluten-free?
Absolutely! This recipe is naturally gluten-free as long as your almond bark and any sprinkles are certified gluten-free. Always double-check packaging if you have sensitive dietary needs.
-
How long will these peanut butter cups stay fresh?
Stored in an airtight container in the fridge, they’ll stay fresh for up to two weeks. For longer storage, freezing is your best bet.
Final Thoughts
This Homemade Peanut Butter Cups Recipe holds a special place in my heart because it’s comfort food that’s simple yet impressive. Whipping up a batch brings back memories of sneaking peanut butter cups as a kid, but now I get to control the ingredients and make them even better—and you will, too! Give this recipe a try, and I promise you’ll have a stash of delicious, homemade treats that everyone will beg you to share.
Print
Homemade Peanut Butter Cups Recipe
- Prep Time: 20 minutes
- Cook Time: 10 minutes
- Total Time: 1 hour 30 minutes
- Yield: 18 servings
- Category: Dessert
- Method: No-Cook
- Cuisine: American
Description
Delicious homemade peanut butter cups made with creamy peanut butter, smooth almond bark, and a touch of vanilla. These easy-to-make treats combine a rich chocolate coating with a sweet peanut butter filling, perfect for any occasion.
Ingredients
Peanut Butter Mixture
- 1 cup creamy peanut butter
- ¼ cup unsalted butter, room temperature
- 1 teaspoon vanilla extract
- 1 ½ cups confectioners sugar
Chocolate Coating
- 1 pound chocolate almond bark or vanilla almond bark
- Sprinkles, optional
Instructions
- Prepare muffin pan: Line a muffin pan with 18 cupcake liners to hold the peanut butter cups.
- Mix peanut butter filling: In a large bowl, use a mixer to blend the peanut butter and unsalted butter until smooth. Add vanilla extract and confectioners sugar, mixing well until combined. The mixture will become crumbly.
- Melt almond bark: Place almond bark in a microwave-safe bowl and heat in 30-second intervals, stirring after each, until the chocolate is completely smooth and melted.
- Coat cupcake liners: Spoon a small amount of melted almond bark into the bottom of each cupcake liner. Spread the chocolate to cover the bottom and slightly up the sides to form a base layer.
- Shape peanut butter discs: Scoop heaping tablespoons of the peanut butter mixture, roll into balls, then flatten each ball into a thick disc shape.
- Assemble peanut butter cups: Place one peanut butter disc into each chocolate-coated cupcake liner, on top of the chocolate base.
- Add top chocolate layer: Spoon the remaining melted almond bark over the peanut butter discs, fully covering them. Add sprinkles immediately if desired for decoration.
- Set and chill: Allow the peanut butter cups to set at room temperature for about 1 hour, or speed up the process by refrigerating them for 30 minutes before serving or storing.
Notes
- Store peanut butter cups in an airtight container in the refrigerator for up to 2 weeks to keep them fresh.
- Customize the treats by adding festive sprinkles or candy decorations for holidays or special occasions.
- Use creamy peanut butter for a smooth texture; crunchy peanut butter may alter the texture.
- Ensure the almond bark is fully melted and smooth for an even chocolate coating.
Nutrition
- Serving Size: 1 peanut butter cup
- Calories: 210 kcal
- Sugar: 18 g
- Sodium: 80 mg
- Fat: 14 g
- Saturated Fat: 5 g
- Unsaturated Fat: 7 g
- Trans Fat: 0 g
- Carbohydrates: 19 g
- Fiber: 1 g
- Protein: 5 g
- Cholesterol: 15 mg