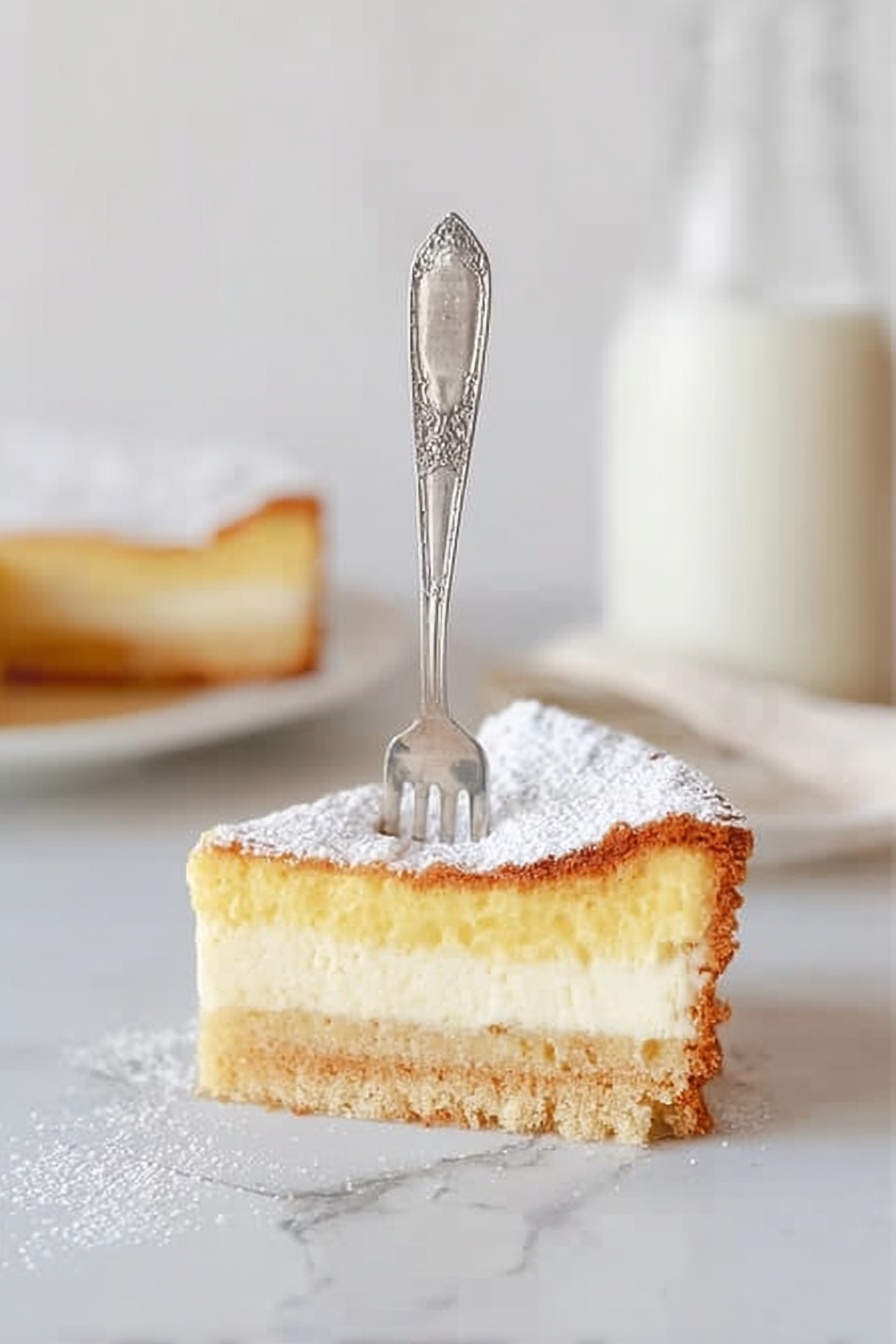
Gooey Butter Cake Recipe
If you’ve never had the pleasure of biting into a warm slice of this classic Midwestern delight, let me introduce you to the magic of my Gooey Butter Cake Recipe. This cake is the ultimate buttery, sweet, and slightly tangy treat that practically melts in your mouth — it’s like a satisfyingly rich hug from the inside out. Whether you’re serving it for breakfast, dessert, or just because you deserve a little joy, this recipe will quickly become your go-to comfort cake. Stick with me, and I promise you’ll nail this gooey dream on your first try!
Why This Recipe Works
- Simple Ingredients, Big Flavor: Using boxed cake mix keeps things foolproof while the cream cheese filling adds lusciousness.
- Perfect Gooey Texture: The balance between baked crust and soft filling delivers that signature ‘gooey’ factor.
- Easy to Customize: You can tweak flavors or batter thickness based on your preference without messing up the base.
- Timing is Everything: Baking just long enough ensures it’s set around the edges but deliciously soft in the center.
Ingredients & Why They Work
This Gooey Butter Cake Recipe uses ingredients you probably already have in your pantry, and each plays a key role in creating this perfect balance of cake and creamy filling. Pro tip: room temperature eggs and softened cream cheese make combining the ingredients smooth and effortless.

- Yellow cake mix: Using a boxed mix saves time and guarantees a consistent, tender crumb without fussing over flour measurements.
- Eggs: Provide structure to both cake and filling; room temp eggs help create a smooth batter without clumping.
- Vanilla extract: Adds warmth and enhances the sweet, buttery notes in both layers.
- Butter (melted): This is key for richness and moist texture; be sure not to overheat or burn it.
- Cream cheese: The star in the filling that gives this cake its signature tangy creaminess and gooey consistency.
- Confectioners sugar: Essential for sweetening the filling and giving it that smooth, melt-in-your-mouth finish.
Tweak to Your Taste
One of the reasons I keep coming back to this Gooey Butter Cake Recipe is how easy it is to make your own. I’ve played with swapping vanilla for almond extract or adding a handful of chocolate chips to the filling for extra decadence. Feel free to experiment to fit your cravings — this cake is forgiving and fun!
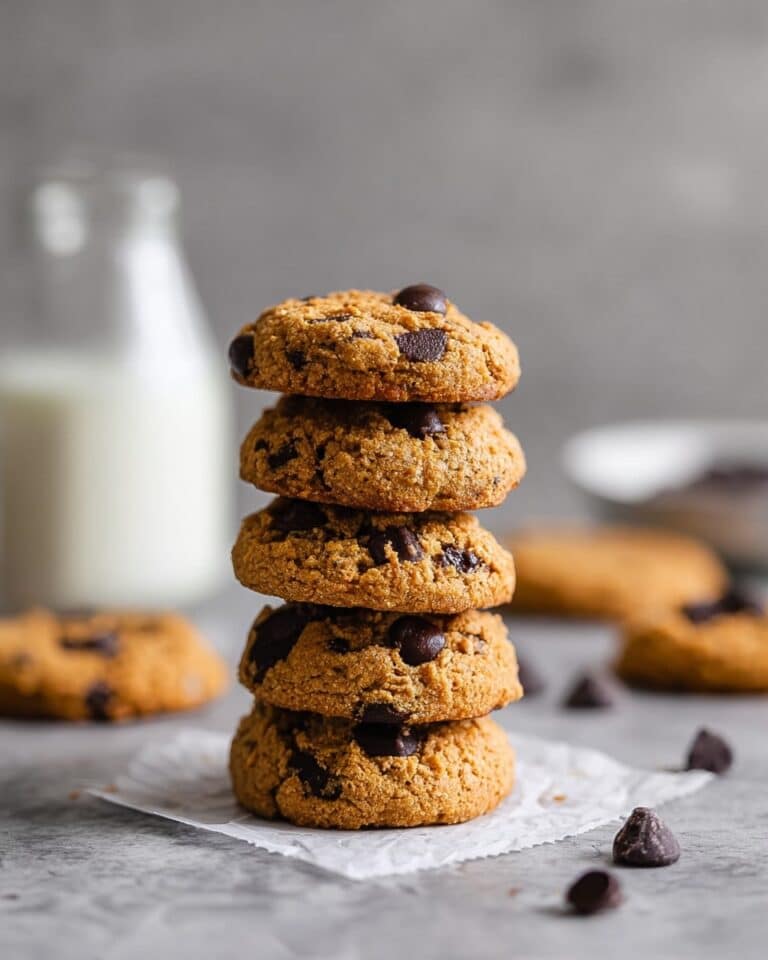
- Chocolate Chip Variation: I once added mini chocolate chips to the cream cheese filling, and it was an absolute hit at a family brunch.
- Seasonal Flavor: Adding a teaspoon of pumpkin pie spice in fall creates a cozy twist perfect for holidays.
- Lower Sugar Version: Substitute half the confectioners sugar with a powdered sugar alternative if you want to cut down sweetness slightly without losing that silky texture.
Step-by-Step: How I Make Gooey Butter Cake Recipe
Step 1: Mix the Cake Base
Start by preheating your oven to 350°F (I usually do 325°F if using convection). In a medium bowl, whisk together the yellow cake mix, 2 eggs, vanilla, and melted butter. I like mashing them with a fork to blend everything without over-mixing — the texture should be uniform with no lumps but still a bit thick. Press this mixture firmly into your prepared pan, making sure it’s evenly spread and as flat as possible. This forms the sturdy bottom crust that holds all that gooey goodness.
Step 2: Prepare the Creamy Filling
In your stand mixer or with a hand mixer, beat the cream cheese, 2 eggs, vanilla, and melted butter until smooth and creamy. Add the confectioners sugar slowly—like one cup at a time—while mixing on low speed to avoid a sugar cloud in your kitchen (been there, done that!). Continue mixing until the filling is silky smooth, then pour it gently over your cake base.
Step 3: Bake to Perfection
Pop the pan in the oven and bake for about 35-45 minutes. This is where I’ve learned the most—don’t wait until it’s fully firm in the center! You want the edges to get a golden brown while the center stays just a little jiggly. Trust me, that’s the sweet spot for the perfectly gooey texture. Once out, let it cool completely; this helps it set up so you can cut clean slices without the filling oozing everywhere.
Pro Tips for Making Gooey Butter Cake Recipe
- Room Temperature Ingredients: Always use room temp eggs and cream cheese for easy mixing and a silky texture.
- Don’t Overbake: Watch the cake closely in the last 10 minutes to ensure that moist gooey center — it’ll set up as it cools.
- Pan Choice Matters: I prefer a 9×13-inch pan for even baking and those perfect edges, but a deep 9-inch round works great too.
- Let It Cool Fully: Cutting into it too soon makes a mess — patience here pays off with neat, luscious slices.
How to Serve Gooey Butter Cake Recipe
Garnishes
I love sprinkling a light dusting of extra confectioners sugar just before serving—it gives that beautiful powdered snow look and adds a little extra sweetness. Sometimes I add fresh berries on the side or a dollop of whipped cream for a lovely contrast to the rich, buttery cake.
Side Dishes
This Gooey Butter Cake holds its own as a dessert star but pairs beautifully with a simple cup of coffee or tea. For brunch, I serve it alongside fresh fruit or a light green salad to balance the richness.
Creative Ways to Present
For a festive touch during holidays, I’ve served this cake cut into bite-size squares stacked on a pretty platter with sprinkles or chopped nuts on top. It always disappears fast at parties! You can also drizzle melted chocolate or caramel sauce for an extra indulgent presentation.
Make Ahead and Storage
Storing Leftovers
Once cooled, I cover the cake tightly with plastic wrap and keep it in the fridge. It stays moist and delicious for up to five days — and if you’re like me, you’ll be grabbing second helpings way before that.
Freezing
I’ve frozen this cake wrapped well in foil and placed in an airtight container with great results. Just thaw overnight in the fridge and reheat briefly if you prefer it warm. Freezing doesn’t compromise that gooey texture at all, which is fantastic when you want to prep ahead.
Reheating
To bring leftovers back to life, I like reheating slices at 300°F in the oven for about 10-12 minutes wrapped in foil to warm them gently without drying out the cake. Microwaving works too in a pinch—just 20-30 seconds on medium power to avoid melting the gooey center into a puddle.
FAQs
-
Can I use a different flavor of cake mix for this Gooey Butter Cake Recipe?
Absolutely! While the classic version uses yellow cake mix to keep things traditional, swapping in white or even spice cake mixes can give your Gooey Butter Cake a fun new twist. Just stick to the same measurements and you’ll be good to go.
-
Why is my Gooey Butter Cake too runny or not setting?
If your cake’s filling isn’t setting, it’s likely underbaked. Make sure you bake it until the edges are browned and the center is slightly jiggly but not liquid. Also, letting it cool fully before slicing helps it firm up perfectly.
-
Can I make this recipe gluten-free?
You can try using a gluten-free yellow cake mix and ensure your other ingredients are gluten-free certified. Keep in mind the texture might vary slightly, but the cake still tastes amazing with this adjustment.
-
How should I store leftovers of Gooey Butter Cake?
Store leftovers in an airtight container in the refrigerator for up to five days. This keeps the cake moist and maintains the gooey texture beautifully.
-
Can I double the recipe for a larger batch?
Yes, just double all ingredients and use a larger pan, such as a 9×15-inch. You may need to adjust baking time slightly, so keep an eye on the edges and center to avoid overbaking.
Final Thoughts
This Gooey Butter Cake Recipe holds a special place in my heart — it reminds me of cozy family gatherings and those moments when simple indulgence feels just right. It’s easy enough for a weeknight treat, yet elegant enough to impress guests. I hope you enjoy making it as much as I do, and that it becomes your favorite recipe to share with people you love. Seriously, once you try it, you’ll understand exactly why it’s called the “gooey” butter cake!
Print
Gooey Butter Cake Recipe
- Prep Time: 15 minutes
- Cook Time: 45 minutes
- Total Time: 1 hour
- Yield: 12 servings
- Category: Dessert
- Method: Baking
- Cuisine: American
Description
This delicious Ooey Gooey Butter Cake features a rich, buttery yellow cake base topped with a creamy, sweet cream cheese filling dusted with confectioners sugar. Perfectly baked to achieve a slightly gooey center and crisp edges, this dessert is a crowd-pleaser for any occasion.
Ingredients
Cake
- 1 package yellow cake mix
- 2 eggs, room temperature
- 1 teaspoon vanilla extract
- 1/2 cup butter, melted (113g)
Filling
- 1 package cream cheese, room temperature (8 ounces)
- 2 eggs
- 1 teaspoon vanilla extract
- 1/2 cup butter, melted (113g)
- 4 cups confectioners sugar
Instructions
- Preheat Oven: Heat oven to 350 degrees Fahrenheit. For convection ovens, set to 325 degrees Fahrenheit.
- Prepare Cake Mixture: In a bowl, combine the yellow cake mix, 2 eggs, 1 teaspoon vanilla extract, and melted butter. Use a fork to mash together until all ingredients are fully incorporated into a uniform batter.
- Prepare Pan: Spray a 9-inch by 3-inch round cake pan or a 9-inch by 13-inch pan with baking spray, or line the bottom with parchment paper to prevent sticking.
- Press Cake Layer: Press the cake mixture evenly into the bottom of the prepared pan, smoothing it flat as much as possible to form the base layer.
- Make Filling: In a stand mixer, place cream cheese, remaining 2 eggs, 1 teaspoon vanilla extract, and melted butter. Beat on medium speed until the mixture is creamy and smooth.
- Add Sugar: Gradually add the confectioners sugar, one cup at a time, mixing on low speed after each addition until all 4 cups are fully incorporated and the filling is smooth.
- Assemble Cake: Pour the cream cheese filling evenly over the pressed cake mixture in the pan.
- Bake: Bake in the preheated oven for 45 minutes. Remove the cake when the edges are brown and set but the center remains slightly jiggly to avoid overcooking.
- Cool: Allow the cake to cool completely before serving to let the filling set properly.
Notes
- Use room temperature eggs and cream cheese for smoother batter and filling.
- You can use either a round cake pan or a rectangular pan depending on your preference.
- Do not overbake; the center should remain slightly jiggly to maintain the ooey gooey texture.
- If desired, dust additional confectioners sugar on top before serving for an extra sweet touch.
- This cake is best served at room temperature or chilled.
Nutrition
- Serving Size: 1 slice (1/12 of cake)
- Calories: 450 kcal
- Sugar: 40 g
- Sodium: 250 mg
- Fat: 25 g
- Saturated Fat: 15 g
- Unsaturated Fat: 9 g
- Trans Fat: 0.5 g
- Carbohydrates: 55 g
- Fiber: 1 g
- Protein: 5 g
- Cholesterol: 110 mg


