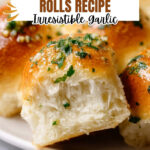
Garlic Bread Rolls Recipe
If you love the cozy, irresistible aroma of freshly baked homemade bread, then you are going to adore this Garlic Bread Rolls Recipe. These little rolls come out soft and fluffy, bursting with buttery garlic goodness that’s perfect for dinner, snacking, or impressing guests. Whether you’re a baking newbie or a seasoned pro, I promise you’ll find these rolls a comforting and foolproof treat worth making again and again.
Why This Recipe Works
- Perfect Garlic Flavor: Mildly roasted garlic butter infuses each roll with aromatic, savory depth without overpowering the bread.
- Soft, Fluffy Texture: A tender crumb achieved by gentle kneading and the right flour-to-liquid balance makes these rolls melt in your mouth.
- Simple Ingredients & Steps: Everyday pantry staples and straightforward instructions mean anyone can succeed with this recipe.
- Versatile & Crowd-Pleasing: These rolls pair beautifully with soups, salads, pasta, or just butter and a sprinkle of flaky sea salt.

Ingredients & Why They Work
This Garlic Bread Rolls Recipe relies on basic ingredients that come together to create more than just bread — it’s all about balance and fresh flavors. A little sweet sugar works with yeast for a lively rise, while fresh parsley adds a bright herbal note that cuts through the indulgence of butter and garlic.
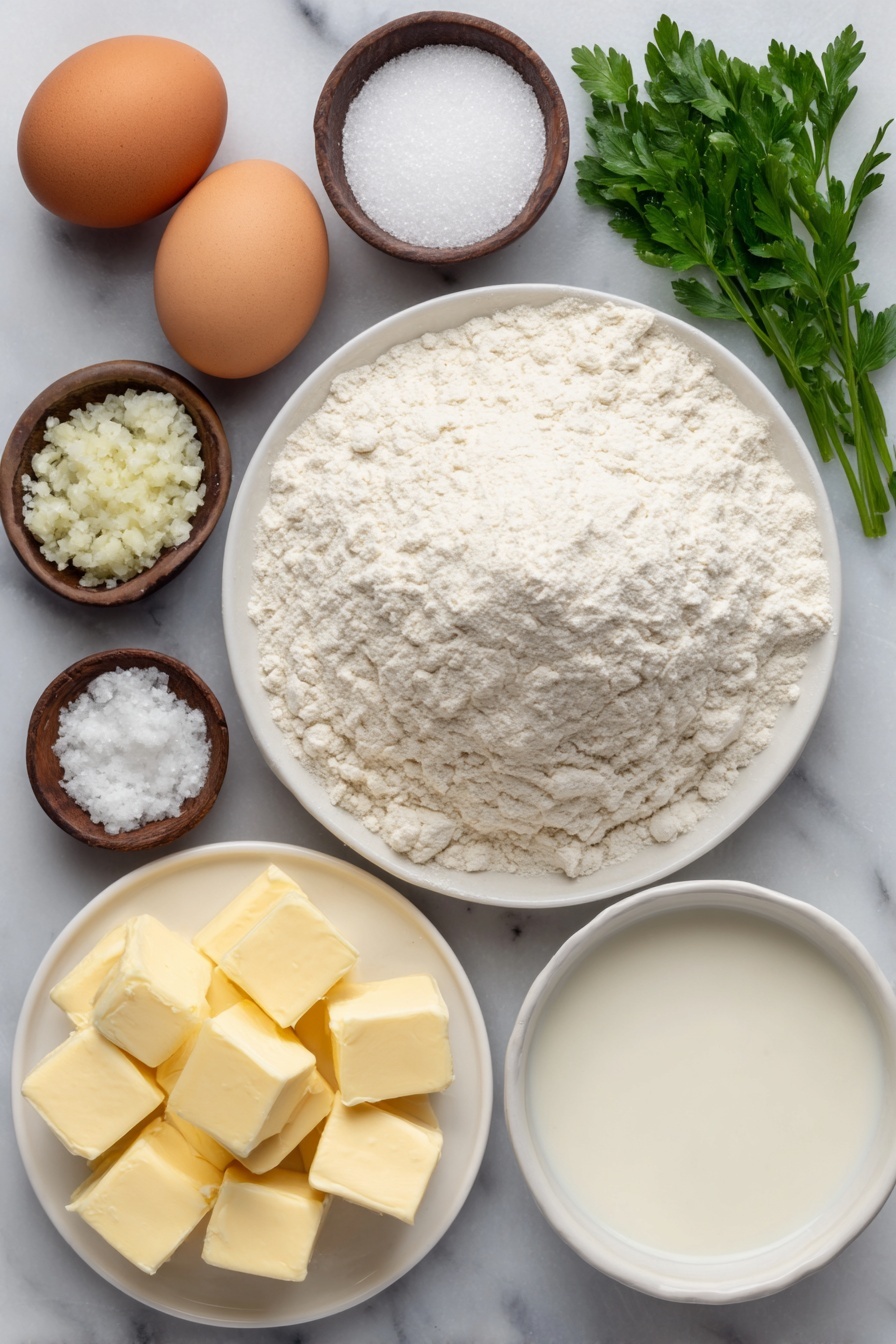
- Unsalted Butter: For that rich, creamy base without extra salt throwing off the balance; melted and used in and on the rolls for flavor and softness.
- Minced Garlic: Fresh is key here — it provides a punch of garlicky aroma that’s mellowed by gentle cooking.
- All-purpose Flour: The backbone of the bread; spooned and leveled to avoid dry or dense dough.
- Fresh Parsley: Chopped finely for a fresh, green bite inside the dough and as a finishing touch.
- Granulated Sugar: Feeds the yeast and helps the rolls brown beautifully.
- Instant Yeast: Makes the dough rise reliably, giving the rolls their airy texture.
- Fine Sea Salt: For seasoning that enhances all the flavors without bitterness.
- Milk: Warmed for activating yeast and tenderizing the crumb for softness.
- Eggs: One for enriching the dough and another for a shiny golden finish once baked.
- Flaky Sea Salt: The last touch that adds crunch and bursts of salty flavor once baked and buttered.
Tweak to Your Taste
While I love the classic garlic and parsley combo for this recipe, feel free to make these rolls your own. I’ve tried swapping in different herbs or cheeses, and let me tell you—each tweak adds a fun new twist that your friends will ask for again!
- Herb Variations: Try rosemary or thyme instead of parsley. I once made these with a combo of oregano and basil, which paired wonderfully with a tomato soup on a chilly night.
- Cheese Addition: Toss in some finely shredded Parmesan or mozzarella inside each roll before rising for gooey, cheesy pockets.
- Spice it Up: Add a pinch of crushed red pepper flakes into the garlic butter for a subtle kick that wakes up your taste buds.
- Dietary Mods: Substitute milk with a plant-based alternative and use vegan butter to make these dairy-free; just keep an eye on dough consistency and rising times.
Step-by-Step: How I Make Garlic Bread Rolls Recipe
Step 1: Prep the Garlic Butter Base
Start by gently melting the butter in a small pot and adding the minced garlic. Cook it just long enough for the garlic to release its fragrance—about 1-2 minutes. This step is crucial because raw garlic can be too sharp, but lightly sautéed garlic brings out that sweet, savory flavor that makes these rolls irresistible. Once done, set it aside to cool while you prep the other ingredients.
Step 2: Mix and Knead the Dough
In your stand mixer bowl, whisk together the flour, chopped parsley, sugar, yeast, and salt. Then pour in the warm milk, the beaten egg, and the cooled garlic butter mixture. Attach your dough hook and mix on low speed, kneading until the dough is smooth and slightly tacky. This usually takes 10-12 minutes. If it feels too sticky, sprinkle a tablespoon of flour at a time—but don’t overdo it or your rolls will turn out dense. I always find that a little patience in kneading makes the biggest difference here.
Step 3: Shape and Proof the Rolls
Once your dough is perfectly kneaded, divide it into 12 equal pieces—around 67 grams each if you want precision! Roll each piece into a smooth ball, pinching the seam tightly underneath to keep them round and neat. Arrange these dough balls in your buttered 9×13 pan. Cover them with plastic wrap or a clean towel and let them rise somewhere warm for about 1-2 hours, or until doubled in size. Watching those little dough balls puff up is always so satisfying—like magic happening right before your eyes!
Step 4: Brush and Bake
Preheat your oven to 350°F (180°C). Brush the tops of your risen rolls with the beaten egg wash to give them a beautiful golden sheen as they bake. Pop them in the oven and bake for 20-30 minutes until the tops are perfectly golden brown and the rolls sound hollow when tapped. This step fills your kitchen with that incredible garlic bread smell—the best part of baking, hands down!
Step 5: Final Garlic Butter Touch
While the rolls bake, melt your butter again with minced garlic and fresh parsley. When the rolls come out hot from the oven, brush them immediately with this garlic butter blend for extra gooey, irresistible flavor. A sprinkle of flaky sea salt at this point adds a crunchy contrast that I adore. Serve warm and prepare for a happy crowd around your table.
Pro Tips for Making Garlic Bread Rolls Recipe
- Measure Flour Properly: Fluff and spoon flour into your cup or better yet, use a kitchen scale—I’ve seen too many batches turn out dense just from too much flour.
- Temperature Matters: Make sure your milk is warm, not hot, to activate the yeast without killing it—think cozy bath temperature, around 110°F.
- Don’t Rush the Rise: Patience pays off here; letting dough double fully means softer rolls and better texture.
- Garlic Butter Timing: Always brush the butter right after baking to lock in moisture and flavor—wait too long and it won’t soak in as wonderfully.
How to Serve Garlic Bread Rolls Recipe
Garnishes
I love to add a sprinkle of flaky sea salt right after brushing the garlic butter—this little crunch adds a delightful contrast. Sometimes, I finish with a touch of finely chopped extra fresh parsley on top to brighten the look and flavor because it makes the rolls feel that much fresher and more inviting.
Side Dishes
These rolls are my go-to side for rich dishes like creamy tomato soup, Italian pasta with lots of sauce, or slow-cooked stews. They’re perfect for mopping up any sauce or gravy, and my family especially enjoys them alongside baked chicken or roasted veggies for a classic comfort meal.
Creative Ways to Present
For holidays or dinner parties, I like to serve the rolls in a large rustic basket lined with a linen cloth, with little jars of extra garlic butter and herb-infused olive oil on the side for dipping. Another fun idea is to make a “pull-apart” bread platter by arranging the rolls close together in a round pan for guests to tear apart — it feels interactive and super cozy.
Make Ahead and Storage
Storing Leftovers
Leftover rolls keep pretty well at room temperature in an airtight container or sealed ziplock bag for 2-3 days. I always try to eat them fresh, but when I have leftovers, I’ll refresh them in the oven to bring back that soft texture.
Freezing
I’ve found freezing these garlic bread rolls after baking works great too—just cool completely, then store them in an airtight container or freezer bag for up to one month. When you want to enjoy them, thaw at room temperature for a few hours before reheating.
Reheating
To bring leftovers back to life, I pop them in a preheated oven at 350°F wrapped in foil for about 10 minutes. This softens the rolls without drying them out. The microwave works in a pinch too—heat for 20-30 seconds—but I prefer the oven for that fresh-baked vibe.
FAQs
-
Can I use active dry yeast instead of instant yeast in this recipe?
Yes! If you only have active dry yeast, just activate it by stirring it into the warm milk with a pinch of sugar and letting it sit for 5-10 minutes until it gets frothy. Then proceed with the recipe as usual. Be aware that using active dry yeast might require a slightly longer rise time.
-
How do I prevent the rolls from getting too dense?
Measuring your flour correctly is usually the culprit behind dense rolls—avoid scooping the flour directly from the bag. Instead, fluff it then spoon into your measuring cup or weigh it. Also, don’t add too much extra flour during kneading; a slightly tacky dough is what you want for soft rolls.
-
Can I make these rolls ahead of time?
Absolutely! You can shape the dough and place the rolls in the pan the night before, cover tightly, and refrigerate. The next day, let them come to room temperature and double in size before baking. This slow rise actually develops more flavor!
-
What’s the best way to serve these rolls?
Serve them warm, brushed with freshly melted garlic butter and finished with flaky sea salt. They’re perfect alongside soups, salads, or as a snack with a good cheese spread. Trust me, you’ll want to keep a batch in your freezer ready to warm any time!
Final Thoughts
This Garlic Bread Rolls Recipe is one of those dishes I keep coming back to because it’s simple, comforting, and loved by everyone who tries it. I remember the first time I made them—they disappeared so fast at dinner, and I knew I had to share the recipe with all my friends. So, grab your ingredients, roll up your sleeves, and bake these up—you’re in for a treat that’ll fill your kitchen with warmth and your belly with happiness.
Print
Garlic Bread Rolls Recipe
- Prep Time: 1 hour 30 minutes
- Cook Time: 25 minutes
- Total Time: 1 hour 55 minutes
- Yield: 12 servings
- Category: Bread
- Method: Baking
- Cuisine: American
- Diet: Vegetarian
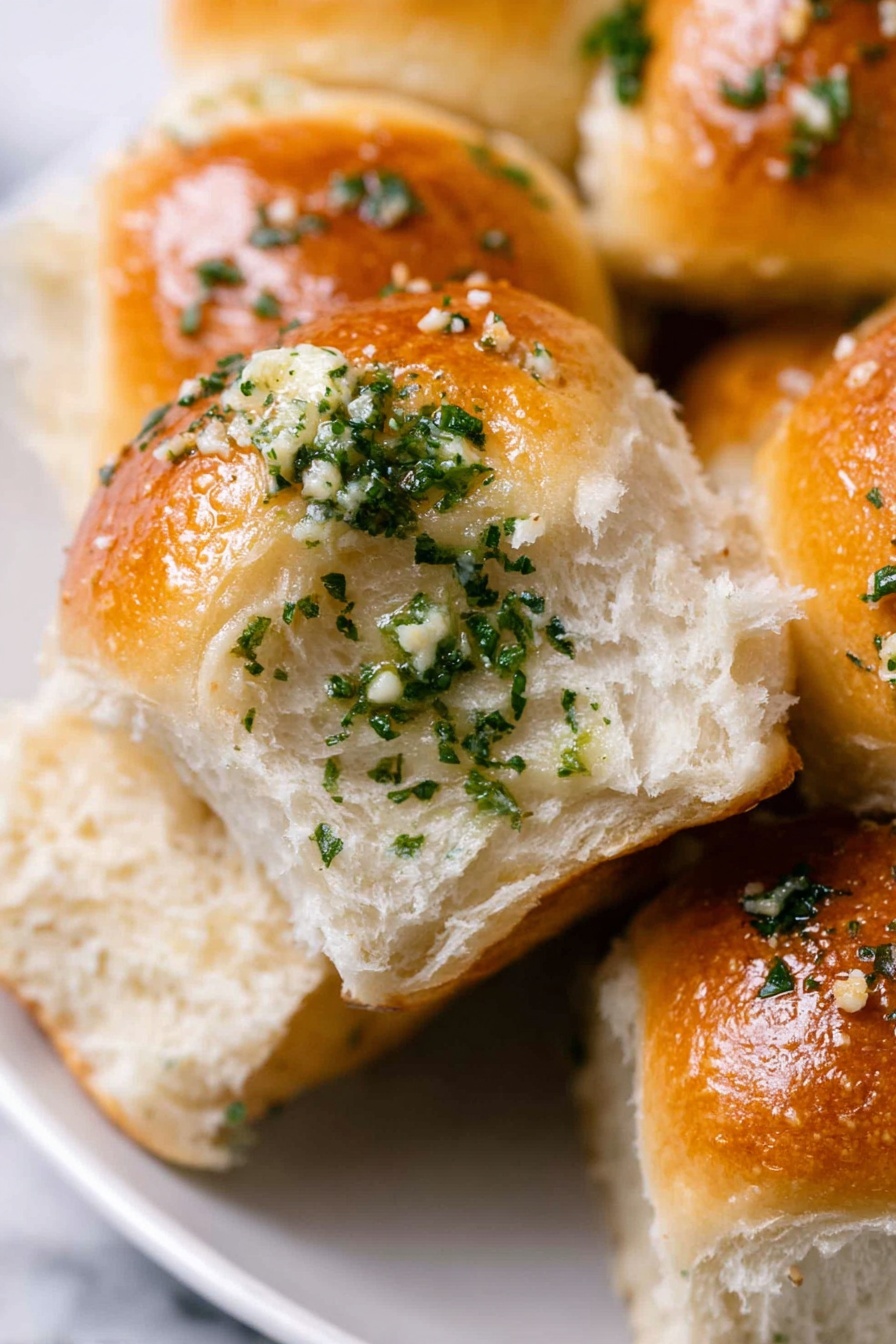
Description
These Garlic Bread Rolls are soft, fluffy, and packed with flavorful garlic butter and fresh parsley. Perfectly golden and brushed with a savory garlic butter glaze, they make a delicious side or snack to complement any meal.
Ingredients
Dough
- 4 1/2 tablespoons unsalted butter
- 2 tablespoons minced garlic
- 3 1/2 cups + 1 tablespoon all-purpose flour
- 3 tablespoons chopped fresh parsley
- 1 tablespoon granulated sugar
- 2 1/4 teaspoons instant yeast
- 1 teaspoon fine sea salt
- 1 cup whole or 2% milk, warmed to 110°F
- 1 large egg, room temperature
- 1 beaten egg, for brushing the tops
Garlic Butter
- 2 tablespoons unsalted butter
- 1 tablespoon minced garlic
- 1 tablespoon chopped fresh parsley
- Flaky sea salt, for finishing
Instructions
- Prepare Baking Pan: Lightly butter the bottom and sides of a 9×13 inch pan and set it aside to prevent sticking.
- Make Garlic Butter for Dough: In a small pot, melt 4 1/2 tablespoons of unsalted butter and add 2 tablespoons minced garlic. Cook for 1-2 minutes until fragrant, then remove from heat and let it cool while measuring other ingredients.
- Mix Dough Ingredients: In a stand mixer bowl, combine 3 1/2 cups plus 1 tablespoon of flour, 3 tablespoons chopped fresh parsley, 1 tablespoon granulated sugar, 2 1/4 teaspoons instant yeast, and 1 teaspoon fine sea salt. Add the warmed milk, 1 large egg, and garlic butter mixture. Knead on low speed with a dough hook for 10-12 minutes until the dough is smooth and tacky. Add flour 1 tablespoon at a time if dough is too sticky.
- Shape the Rolls: Divide the dough into 12 equal portions (about 67 grams each). Shape each piece into a smooth ball by pinching the bottom seam tightly. Place the shaped rolls in the prepared pan. Cover with plastic wrap or a clean kitchen towel and let rise in a warm place until doubled in size, approximately 1-2 hours.
- Preheat Oven and Prepare Egg Wash: Preheat the oven to 350°F (180°C). Brush the tops of the risen rolls with the beaten egg for a golden finish.
- Bake the Rolls: Bake the rolls for 25 minutes or until the tops are golden brown and cooked through.
- Make Garlic Butter for Brushing: While baking, melt 2 tablespoons butter in a pot, add 1 tablespoon minced garlic and cook for 1-2 minutes until fragrant. Remove from heat, stir in 1 tablespoon chopped parsley.
- Finish the Rolls: When the rolls are done, immediately brush them generously with the prepared garlic butter. Sprinkle flaky sea salt on top if desired. Serve warm for best flavor.
Notes
- Measure your dry ingredients properly using the spoon-level method or a kitchen scale for best baking results.
- If using active dry yeast instead of instant yeast, activate it first by stirring into warm milk with sugar and letting it foam for 5 minutes before mixing dough.
- For storage, keep rolls in an airtight container or ziplock bag at room temperature for 2-3 days.
- Freeze baked rolls after cooling in an airtight container for up to one month.
- To make ahead, shape rolls in pan, cover tightly, and refrigerate overnight. Let rise at room temperature before baking.
- Reheat rolls by covering with foil and baking at 350°F until warm or microwaving for 20-30 seconds.
Nutrition
- Serving Size: 1 roll
- Calories: 180 kcal
- Sugar: 2 g
- Sodium: 220 mg
- Fat: 7 g
- Saturated Fat: 4 g
- Unsaturated Fat: 3 g
- Trans Fat: 0 g
- Carbohydrates: 24 g
- Fiber: 1 g
- Protein: 4 g
- Cholesterol: 30 mg