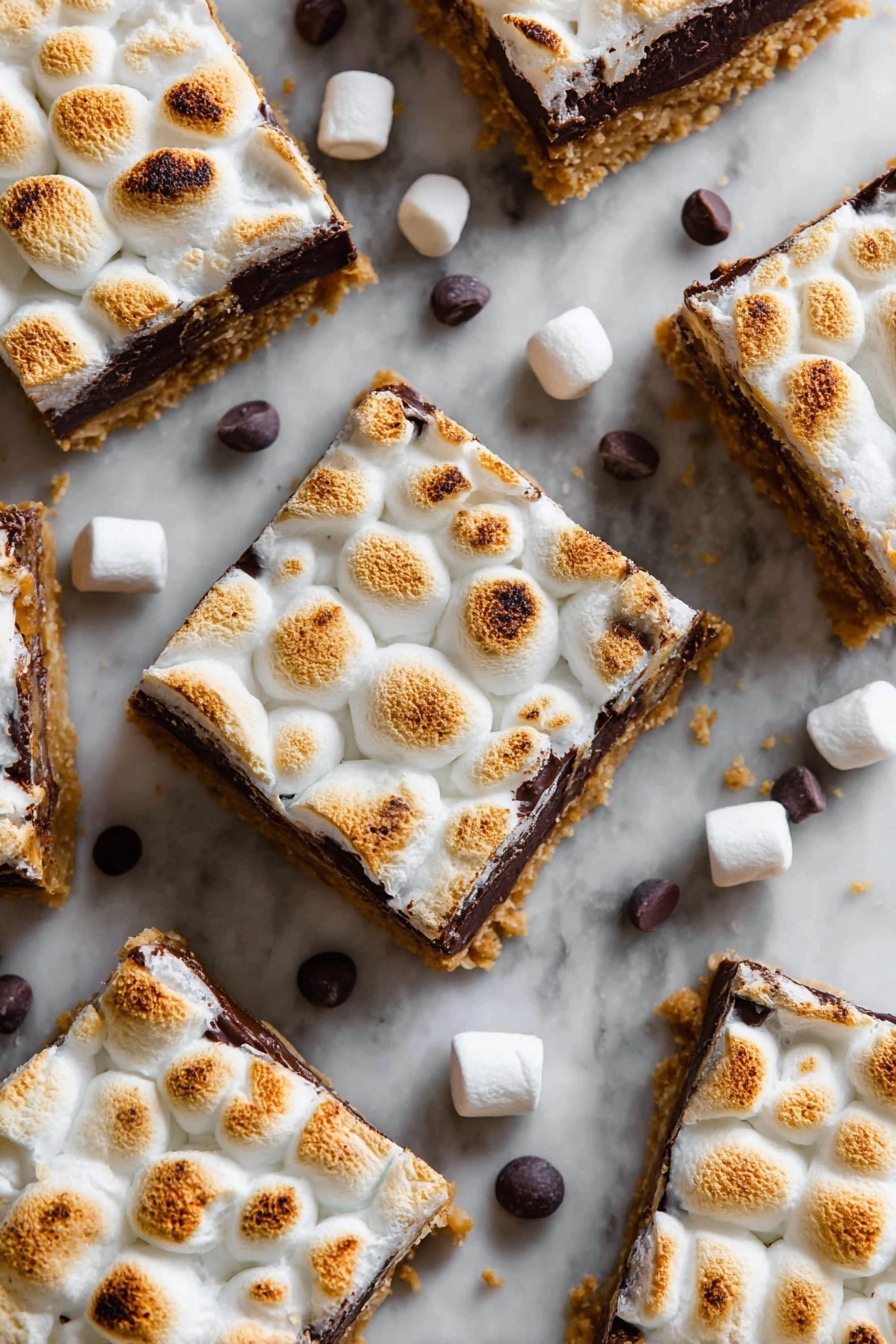
Delicious S’more Bars Recipe
If you’re looking for a treat that instantly brings back cozy campfire memories without having to leave your kitchen, then this Delicious S’more Bars Recipe is your new best friend. I’ve made these bars countless times, and trust me, their crispy graham cracker crust, gooey chocolate layer, and perfectly toasted marshmallows are basically a hug in dessert form. Stick around because I promise once you try this version, you’ll wonder why you ever bothered with roasting marshmallows over a fire in the first place!
Why This Recipe Works
- Simple Ingredients: Uses pantry staples for quick preparation without sacrificing richness.
- Perfect Texture: Crispy crust meets gooey marshmallows and melty chocolate in every bite.
- Easy Technique: No fancy equipment or skills needed, just magic happen in the oven.
- Family Favorite: Kids and adults alike will gobble these bars down every time.

Ingredients & Why They Work
When it comes to this Delicious S’more Bars Recipe, each ingredient plays a starring role in balancing taste and texture, making the layers work together like a charm. Plus, the simple combo makes shopping a breeze – you might already have most of these on hand.
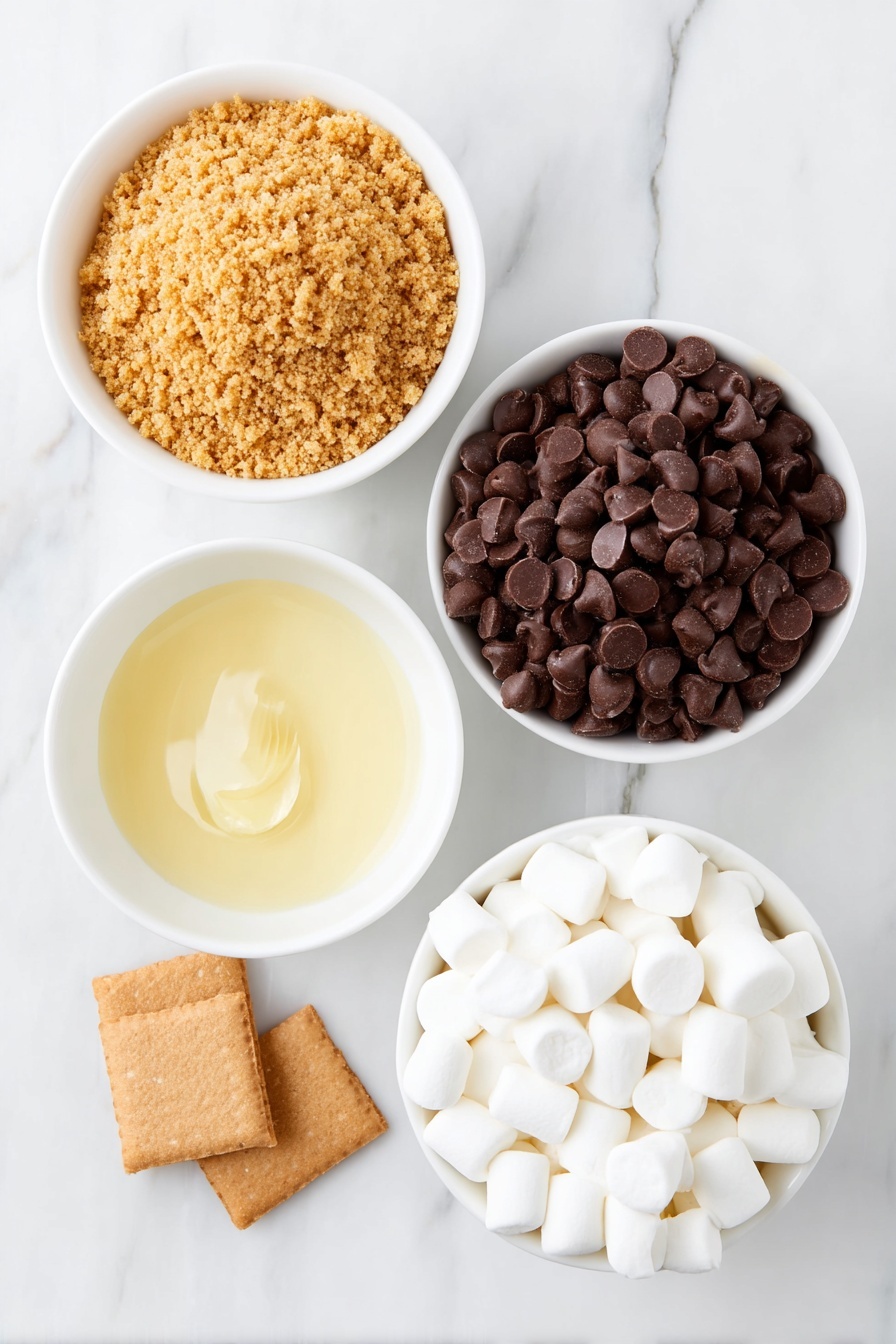
- Graham cracker crumbs: The crumbly base gives you that classic s’more crunch and supports all the gooey toppings beautifully.
- Melted butter: Adds moisture and richness, helping those crumbs stick together for the perfect crust.
- Chocolate chips: Choose semi-sweet or milk chocolate—both melt into luscious pools that pair perfectly with marshmallows.
- Mini marshmallows: Tiny marshmallows toast evenly and make sure every bite gets that signature fluffiness and chew.
Tweak to Your Taste
One of the things I love about this Delicious S’more Bars Recipe is how easy it is to make it your own. Over the years, I’ve tried so many little twists that keep it exciting, and honestly, it’s fun to mix it up based on what you have and the flavors you love.
- Add nuts or pretzels: A handful of chopped peanuts or crushed pretzels brings a salty crunch contrast that I totally adore.
- Use flavored chocolate chips: Try caramel or mint chocolate chips for a fun spin that guests always ask about.
- Go gluten-free: Swap graham crackers for gluten-free crumbs if needed, and you won’t miss a thing.
- Sprinkle sea salt: A light dusting of flaky sea salt on top before baking really elevates those sweet, gooey flavors.
Step-by-Step: How I Make Delicious S’more Bars Recipe
Step 1: Prep Your Pan and Crust
First things first, preheat your oven to 350°F. Grab a 9×13-inch baking pan and spray it well with cooking spray to avoid any sticking disasters later. Then, mix together your graham cracker crumbs with melted butter until everything looks evenly moistened. This is the base that holds your s’mores together, so press the mixture firmly into the bottom and about an inch up the sides of your pan — I usually use the back of a glass to get that solid even layer.
Step 2: Bake the Crust
Pop that pan into the oven for about 8 minutes. This initial bake gives the crust time to set and start crisping without burning. I’ve done the mistake of skipping this step, and the bars were all soggy – trust me, this short bake makes a big difference in texture!
Step 3: Add Chocolate and Marshmallows
After the crust comes out, it’s time to sprinkle on those chocolate chips evenly over the warm base. Don’t skimp here! The warmth from the crust helps them start melting even before the marshmallows hit the pan. Then scatter the mini marshmallows right on top, spreading them out so they roast consistently.
Step 4: Final Bake and Cool
Return the pan to the oven and bake for about 20 minutes, or until your marshmallows turn a gorgeous golden brown and start puffing up. Keep a close eye – marshmallows can go from toasted to burnt in a flash. Once out, let your s’more bars cool completely before sliding the pan into the fridge to chill and set. This helps get those clean squares when you cut them.
Pro Tips for Making Delicious S’more Bars Recipe
- Press Firmly When Forming Crust: I use a flat-bottomed glass to get the crumb layer compact, which prevents crumbling later.
- Watch Marshmallows Closely: Bake near your oven light and check at 15-minute mark to avoid burning the marshmallows.
- Chill Before Cutting: Placing bars in the fridge helps the layers set nicely and makes cleaner slices.
- Don’t Skip the Crust Bake: I learned the hard way that skipping this steps leads to soggy bars – bake it first, always.
How to Serve Delicious S’more Bars Recipe
Garnishes
I often dust a little powdered sugar on top right before serving—it adds a sweet, snowy look that’s irresistible. Another favorite is sprinkling chopped toasted nuts on the marshmallows right after baking for a bit of crunch and nutty flavor that pairs beautifully. If you want to get fancy, drizzle a touch of melted caramel over the top for that extra indulgence.
Side Dishes
These bars shine as a dessert on their own, but pairing them with a scoop of vanilla ice cream is pure bliss. I also like serving them alongside fresh berries or a simple cup of coffee or milk to keep things balanced. For kids’ parties, some sliced fruit or pretzels on the side make for a fun, complementary snack.
Creative Ways to Present
At my last summer barbecue, I cut these bars into bite-sized squares and arranged them on a rustic wooden board alongside small bowls of extra chocolate chips, marshmallows, and graham cracker crumbs—letting guests customize mini s’mores. For holiday treats, packaging individual bars in pretty parchment paper tied with twine makes a charming gift everyone will love.
Make Ahead and Storage
Storing Leftovers
Once cooled, I store leftover s’more bars in an airtight container in the refrigerator. They keep their texture and flavor beautifully for up to 4 days. Just make sure they’re well covered so the marshmallows don’t dry out and the crust stays crisp.
Freezing
I’ve froze these bars wrapped tightly in plastic wrap and then stored in a freezer-safe bag for up to 2 months. When you’re ready, thaw them in the fridge overnight before enjoying. Freezing sometimes softens the marshmallows a bit, but the bars still taste fantastic, especially warmed slightly.
Reheating
To refresh leftover bars, I heat them in a 300°F oven for about 5–7 minutes—this re-melts the chocolate and softens the marshmallows without burning. Microwaving works too but can make marshmallows tough, so oven reheating is my go-to for best texture.
FAQs
-
Can I use regular-sized marshmallows instead of mini ones?
Yes, you can, but mini marshmallows toast more evenly and fit better on the bars. If using regular ones, cut them into smaller pieces or press them gently into the chocolate layer for a more balanced distribution.
-
Do I have to refrigerate these bars?
Refrigerating helps set the bars and makes cutting cleaner, but if you’re eating them right away, you can skip the fridge. Just be mindful that they’ll be more delicate when warm.
-
Can I use white or dark chocolate chips instead?
Absolutely! White chocolate offers a sweeter, creamier twist, while dark chocolate gives a richer, slightly bitter balance to the marshmallows. Feel free to mix and match based on your taste.
-
Is this recipe kid-friendly to make?
Definitely! Kids will love pressing the crust into the pan and sprinkling marshmallows on top. Just handle the oven steps yourself and keep an eye on the toasting marshmallows for safety.
Final Thoughts
This Delicious S’more Bars Recipe has become my secret weapon for almost any occasion—whether it’s a quick afternoon pick-me-up or a must-have dessert at family gatherings. It’s approachable, nostalgic, and so rewarding to make. I hope you enjoy making these bars as much as I do because they truly bring that warm campfire magic to your kitchen anytime you want it. Go on, give it a try and get ready for some serious compliments!
Print
Delicious S’more Bars Recipe
- Prep Time: 30 minutes
- Cook Time: 28 minutes
- Total Time: 58 minutes
- Yield: 6 servings
- Category: Dessert
- Method: Baking
- Cuisine: American
Description
Delicious and easy-to-make S’more Bars featuring a graham cracker crust, gooey melted chocolate, and toasted mini marshmallows. Perfect for a quick dessert that captures the classic campfire treat indoors.
Ingredients
Crust
- 2 cups Graham cracker crumbs
- 0.5 cup Melted butter
Topping
- 4 cups Chocolate chips
- 1 package Mini marshmallows
Instructions
- Preheat Oven: Preheat your oven to 350 degrees Fahrenheit to ensure it’s at the right temperature when you start baking.
- Prepare Pan: Grease a 9×13 inch baking pan with cooking spray to prevent sticking.
- Make Crust: In a bowl, mix the graham cracker crumbs and melted butter until combined. Press this mixture firmly into the bottom and slightly up the sides of the prepared pan to form an even crust.
- Bake Crust: Place the crust in the preheated oven and bake for 8 minutes to set it slightly.
- Add Toppings: Remove the pan from the oven and evenly sprinkle the chocolate chips over the crust. Then, cover the chocolate chips with mini marshmallows.
- Bake with Toppings: Return the pan to the oven and bake for 20 minutes, or until the marshmallows turn golden brown and melted.
- Cool and Chill: Allow the bars to cool down at room temperature, then place the pan in the refrigerator to chill and set for easier slicing.
- Serve: Once chilled, cut the bars into squares and serve.
Notes
- For a richer flavor, use a mix of milk and semi-sweet chocolate chips.
- You can substitute the mini marshmallows with regular sized marshmallows cut in halves if mini are unavailable.
- Press the graham cracker crust firmly to ensure bars hold together well after baking.
- Chilling the bars before cutting helps them slice cleanly without crumbling.
- Store bars in an airtight container in the refrigerator for up to 3 days.
Nutrition
- Serving Size: 1 bar
- Calories: 350 kcal
- Sugar: 28 g
- Sodium: 150 mg
- Fat: 18 g
- Saturated Fat: 10 g
- Unsaturated Fat: 7 g
- Trans Fat: 0 g
- Carbohydrates: 42 g
- Fiber: 2 g
- Protein: 4 g
- Cholesterol: 30 mg


