Christmas Chocolate Covered Oreos Recipe
Alright, friend, I’ve got a sweet holiday treat that’s going to rock your Christmas cookie game — a fan-freaking-tastic Christmas Chocolate Covered Oreos Recipe that’s super easy, looks stunning, and tastes just like a festive dream. Whether you’re aiming to wow guests, gift some homemade goodies, or just want a fun holiday project in the kitchen, this recipe will have you covered… quite literally, in chocolate! Stick with me, and I’ll share all my tips and tricks to make your chocolate-covered Oreos the star of your holiday dessert table.
Why This Recipe Works
- Simple Ingredients: It uses easy-to-find staples, like Oreos and melting wafers, so you’re never searching for exotic stuff at the last minute.
- Double Dipping Fun: The option to dip Oreos in both milk and white chocolate creates a stunning, festive look that feels extra special.
- Customizable Decorations: Sprinkles and colored drizzle let you get creative and tailor your cookies to any holiday theme or personal style.
- Perfect Texture: Using melting wafers guarantees smooth, glossy chocolate that sets just right—no lumps, no cracks.

Ingredients & Why They Work
These ingredients come together in harmony for a cookie that’s both crunchy and creamy, with that classic Oreo flavor enhanced by the rich, smooth milk and white chocolate. Plus, choosing quality melting wafers means you’ll get the best dip and shine, which really makes these Christmas treats pop. Here’s the rundown with my little tips:
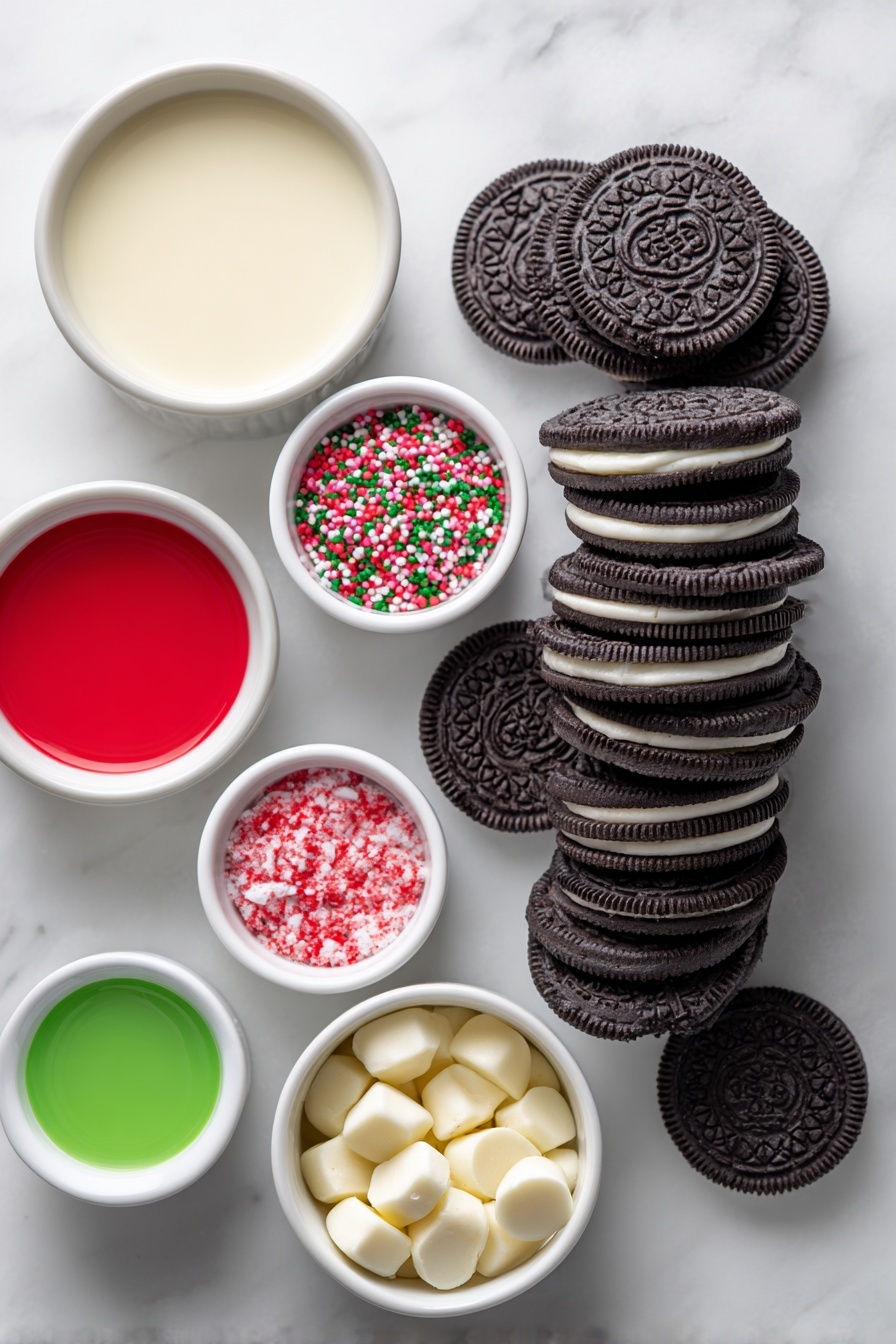
- Oreos: Go with mint if you want a refreshing holiday twist, but regular or Double Stuf are classics and just as delicious.
- Ghirardelli Milk Chocolate Melts: These melting wafers melt evenly and stay smooth longer—perfect for dipping without stress.
- Ghirardelli White Chocolate Melts: Optional, but highly recommended if you want that gorgeous two-tone look on your cookies.
- Assorted Christmas Sprinkles: The festive colors and shapes are the easiest way to get that holiday cheer on your cookies.
- Red and Green Food Coloring: Use these sparingly with your white chocolate melts for festive drizzles and designs.
Tweak to Your Taste
I like to think of this Christmas Chocolate Covered Oreos Recipe as a blank canvas where you can play with flavors and decorations to suit your style. You can easily swap chocolates, add a pinch of sea salt on top, or go all out with sprinkles. It’s your party, after all!
- Chocolate Variations: Sometimes I swap milk chocolate for semi-sweet for a richer bite, or do a full white chocolate dip with colored drizzle for a bright pop.
- Dietary Tweaks: For a dairy-free version, I’ve used vegan chocolate melts successfully—just be mindful of melting times as they can differ.
- Sprinkles and Toppings: Mini crushed candy canes add a peppermint crunch, or edible gold dust adds luxe holiday sparkle.
Step-by-Step: How I Make Christmas Chocolate Covered Oreos Recipe
Step 1: Melt the Chocolate with Care
Start by placing your Ghirardelli Milk Chocolate Melting Wafers in a microwave-safe bowl. Follow the package directions for melting—usually in 30-second bursts, stirring each time until silky smooth. This slow approach avoids overcooking and seizing. If you’re going for double-dipped cookies, melt the white chocolate wafers separately in their own bowl.
Step 2: Dip the Oreos & Drip with Joy
Lay a piece of wax paper beneath a wire rack for easy cleanup. Using a fork, carefully dunk each Oreo into the melted milk chocolate, letting excess drip through the fork’s tines. Gently place on the rack and let set. For double-dipping, wait until the milk chocolate fully hardens—trust me, don’t rush this!—then dip half of each cookie into the white chocolate for that festive two-tone effect.
Step 3: Sprinkle & Decorate Before Setting
While the chocolate is still wet, sprinkle on all your festive goodies: Christmas-themed colored sprinkles, edible glitter, or crushed peppermint bits. If you want to get fancy, add red or green food coloring to your melted white chocolate, snip the corner of a plastic bag, and drizzle over the cookies in whimsical patterns. It’s a small step that adds major holiday vibes.
Step 4: Let Them Set, Patience Pays Off
Here’s a tip from my years of dipping: let your cookies set at room temperature for about 1 hour. This keeps the chocolate glossy and not dull. Tossing them in the fridge speeds up setting but can dull that beautiful shine, which I avoid if I want picture-perfect results. Trust me, your patience will pay off.
Pro Tips for Making Christmas Chocolate Covered Oreos Recipe
- Use High-Quality Melting Wafers: Ghirardelli’s melts glide so smoothly and don’t harden too fast, giving you time to dip without stress.
- Avoid Refrigeration for Glossy Finish: As tempting as the fridge is for quick setting, letting the chocolate set naturally keeps that beautiful shine intact.
- Handle Oreos Gently After Dipping: Let the chocolate firm up fully before touching to avoid fingerprints and smudges—your cookies will look cleaner and more professional.
- Careful with White Chocolate Chips: These can seize and become clumpy; stick to melting wafers for a smooth coating every time.
How to Serve Christmas Chocolate Covered Oreos Recipe
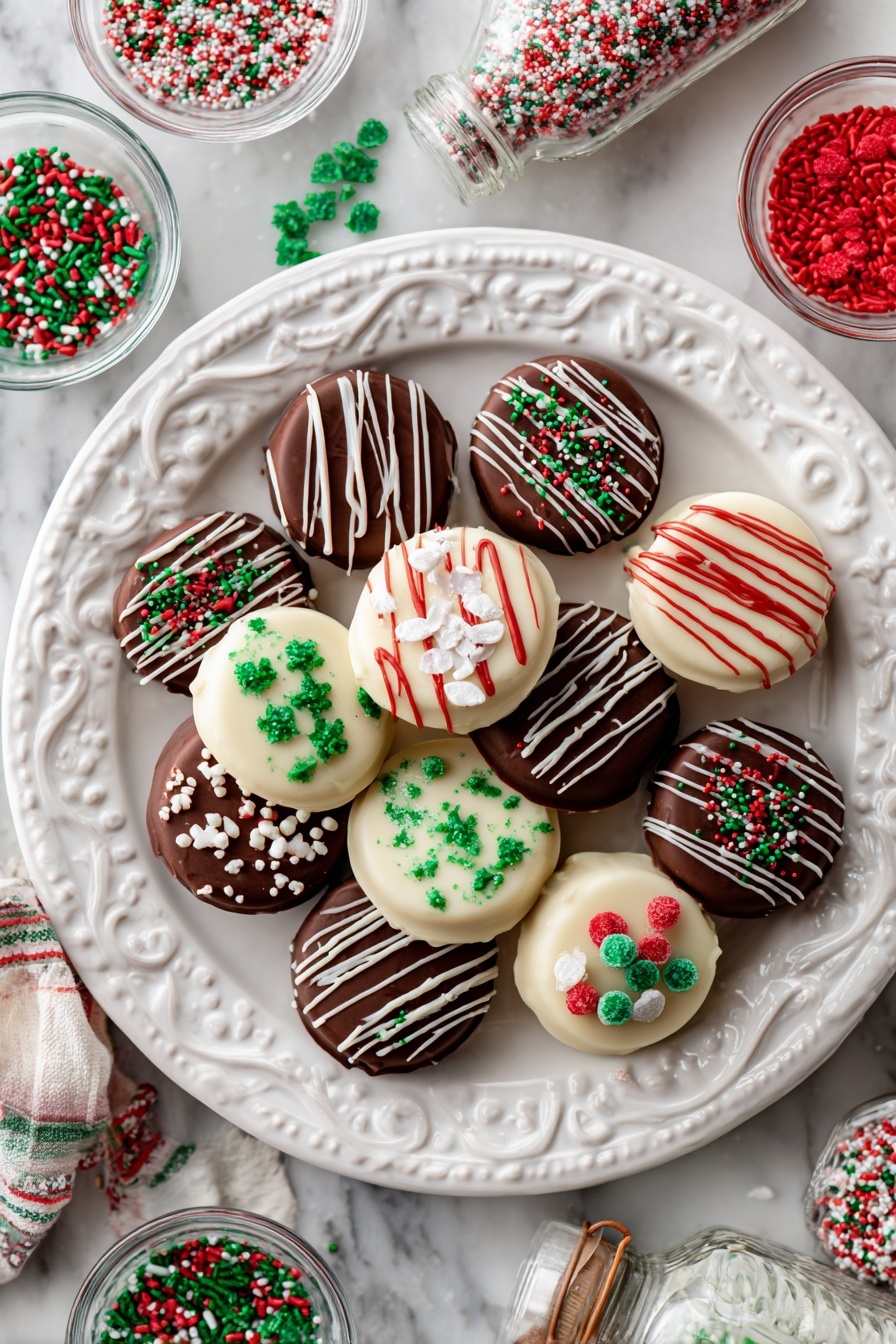
Garnishes
I love topping mine with a mix of classic red and green sprinkles, tiny white snowflakes, and a little edible glitter for sparkle. Sometimes, I drizzle extra colored chocolate on top to create cute holiday patterns — stars, stripes, or even little holly leaves made with green drizzle. It adds that extra “wow” factor and makes them irresistible for guests.
Side Dishes
Pair these cookies with hot cocoa, spiced cider, or even a holiday coffee bar. They’re the perfect sweet treat alongside peppermint bark, gingerbread men, or a simple cheese and fruit platter for balancing sweet and savory flavors at your holiday parties.
Creative Ways to Present
When gifting, I like to stack them in clear cellophane bags tied with festive ribbons, or arrange them delicately in holiday-themed boxes lined with parchment. For parties, a tiered dessert stand sprinkled with some pine branches and tiny ornaments creates a magical holiday display that guests always talk about.
Make Ahead and Storage
Storing Leftovers
Once they’re set, I store these Christmas Chocolate Covered Oreos in an airtight container at room temperature. They last beautifully for about 2 weeks this way, which means you can bake ahead and keep snack-ready treats on hand for that holiday crowd.
Freezing
If you want to stash some for later, freezing works well! Wrap each cookie individually with parchment, then place in a freezer-safe container. They’ll keep up to 6 months and thaw nicely without losing flavor — though the chocolate gloss might dull a bit.
Reheating
These cookies don’t really need reheating, but if you want to bring back a bit of that fresh-from-the-kitchen softness, let them thaw at room temp for about 30 minutes. Avoid microwaving or heating directly, which can melt the delicate chocolate finish.
FAQs
-
Can I use regular chocolate chips instead of melting wafers for this Christmas Chocolate Covered Oreos Recipe?
You can, but it’s trickier. Regular chocolate chips often need tempering and don’t melt as smoothly as melting wafers, especially white chocolate chips, which tend to seize. If you want an easier experience and a glossy finish, I strongly recommend sticking with quality melting wafers like Ghirardelli’s.
-
How long do Christmas Chocolate Covered Oreos stay fresh?
Stored in an airtight container at room temperature, these cookies remain delicious for about 2 weeks. Refrigerating can extend their life up to a month, but the chocolate may lose some shine. Just make sure they’re well sealed to avoid moisture.
-
What’s the best way to decorate the chocolate-covered Oreos for Christmas?
I love using festive sprinkles right after dipping while the chocolate is still wet. You can also color your white chocolate melts with red and green food coloring for drizzled designs — it makes the cookies look extra festive and professional without much effort.
-
Can I double dip in white and milk chocolate in different ways?
Absolutely! You can fully dip in milk chocolate and then half dip in white chocolate, do the reverse, or even split dip halves in different chocolates. Feel free to experiment and find what looks and tastes best to you — it’s part of the fun!
Final Thoughts
This Christmas Chocolate Covered Oreos Recipe holds a special place in my holiday heart — it’s easy to make, packs a flavor punch, and always steals the show at holiday gatherings. I hope you’ll have as much fun dipping, decorating, and sharing these cookies as I do. Trust me, once you try this recipe, it’ll become a festive tradition you’ll look forward to year after year. So grab your favorite Oreos and let’s get dipping — Christmas magic awaits!
Print
Christmas Chocolate Covered Oreos Recipe
- Prep Time: 15 minutes
- Cook Time: 0 minutes
- Total Time: 1 hour 15 minutes
- Yield: 36 servings
- Category: Dessert
- Method: No-Cook
- Cuisine: American
Description
Delicious Christmas Chocolate Covered Oreos dipped in smooth milk chocolate and optionally double-dipped with white chocolate, decorated with festive sprinkles for a perfect holiday treat.
Ingredients
Oreos
- 1 (15-ounce) package Oreos (mint, regular, or Double Stuf)
Chocolate
- 1 (10-ounce) package Ghirardelli milk chocolate melts
- 1 (10-ounce) package Ghirardelli white chocolate melts (optional for double-dipped cookies)
Decorations
- Assorted Christmas sprinkles, as desired
- Red food coloring (optional, as desired)
- Green food coloring (optional, as desired)
Instructions
- Melt Milk Chocolate: In a medium, microwave-safe bowl, melt the Ghirardelli Milk Chocolate Melting Wafers according to package directions until smooth.
- Melt White Chocolate (optional): If double-dipping, melt the Ghirardelli White Chocolate Melting Wafers in a separate medium, microwave-safe bowl following package instructions.
- Dip Oreos in Milk Chocolate: Place wax paper under a wire rack. Using a fork, dip each Oreo into the melted milk chocolate, allowing excess chocolate to drip off between fork tines. Gently place dipped Oreos on the wire rack.
- Double Dip (optional): Once milk chocolate has fully set, pick up the cookie and dip half of it into melted white chocolate. Place back on the rack.
- Add Sprinkles: Before the chocolate sets, sprinkle Christmas-themed sprinkles over the cookies.
- Decorate with Colored Chocolate (optional): Add red or green food coloring to melted white chocolate to your desired shade, transfer to small plastic baggies, snip the corners, and pipe or drizzle decorative lines on the cookies.
- Set Chocolate: Allow cookies to set at room temperature for about 1 hour until chocolate is firm. Avoid refrigerating if you want a shiny finish, though refrigeration for storage is acceptable.
- Store: Keep cookies in an airtight container at room temperature for up to 2 weeks, refrigerate for 1 month, or freeze for up to 6 months. Note that refrigeration or freezing dulls chocolate shine.
Notes
- Milk chocolate is recommended for dipping for traditional flavor, but semi-sweet chocolate also works.
- Double dipping options include fully white chocolate dipped or milk chocolate dipped, or mixing both.
- Use chocolate candy melts or melting wafers like Ghirardelli for smooth melting and easy dipping.
- White chocolate chips are tricky to melt and prone to seizing; melting wafers are preferred.
- Refrigeration or freezing the cookies can dull the shine of the chocolate but doesn’t affect taste.
Nutrition
- Serving Size: 1 cookie
- Calories: 120 kcal
- Sugar: 14 g
- Sodium: 90 mg
- Fat: 6 g
- Saturated Fat: 3.5 g
- Unsaturated Fat: 2 g
- Trans Fat: 0 g
- Carbohydrates: 16 g
- Fiber: 1 g
- Protein: 1 g
- Cholesterol: 5 mg


