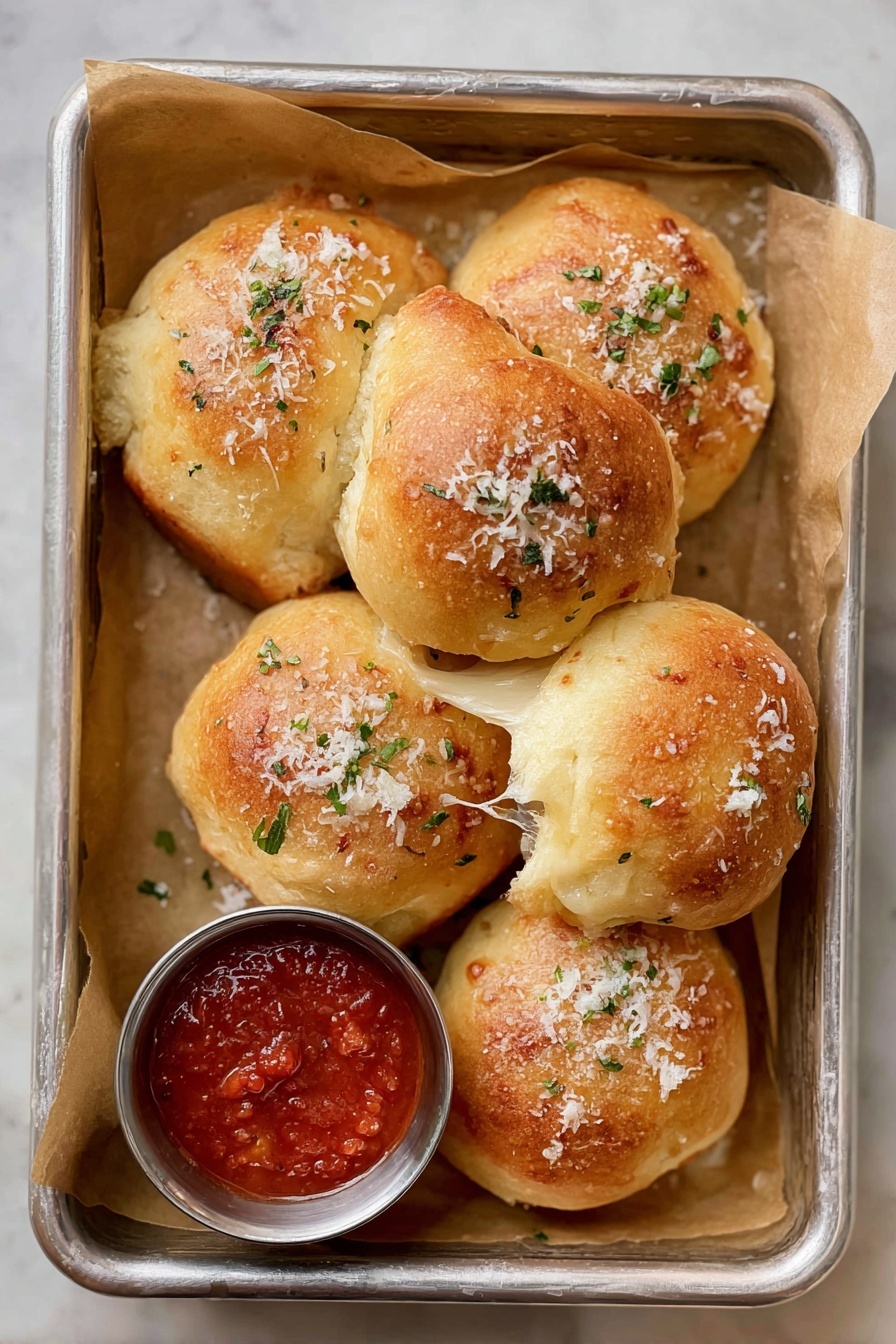
Cheesy Pizza Bombs with Garlic Butter and Pepperoni Recipe
If you’re looking to wow your friends and family with a bite-sized treat that’s bursting with flavor, trust me, you’re going to want to make this Cheesy Pizza Bombs with Garlic Butter and Pepperoni Recipe. These little bundles of ooey-gooey cheese, spicy pepperoni, and garlicky butter are downright addictive. Once you try them, you’ll find yourself making them again and again — they’re perfect for game day, movie night, or just because you deserve a snack that feels like a party in your mouth.
Why This Recipe Works
- Simple Ingredients, Big Impact: Using store-bought biscuits simplifies the dough step without sacrificing that fresh-baked feel.
- Balanced Flavors: The mozzarella’s melty creaminess pairs perfectly with zesty pepperoni and garlic-parmesan butter.
- Versatile Cooking Methods: You can bake these in the oven or whip them up quickly in the air fryer.
- Finger Food Fun: These bombs are easy to eat and perfect for sharing, which makes them a guaranteed crowd-pleaser.

Ingredients & Why They Work
The magic of this Cheesy Pizza Bombs with Garlic Butter and Pepperoni Recipe happens because each ingredient plays a special role — from the soft buttermilk biscuits that puff up just right to the rich garlic butter that turns each bite into pure joy. When shopping, look for high-quality pepperoni and fresh mozzarella to really make these bombs shine.
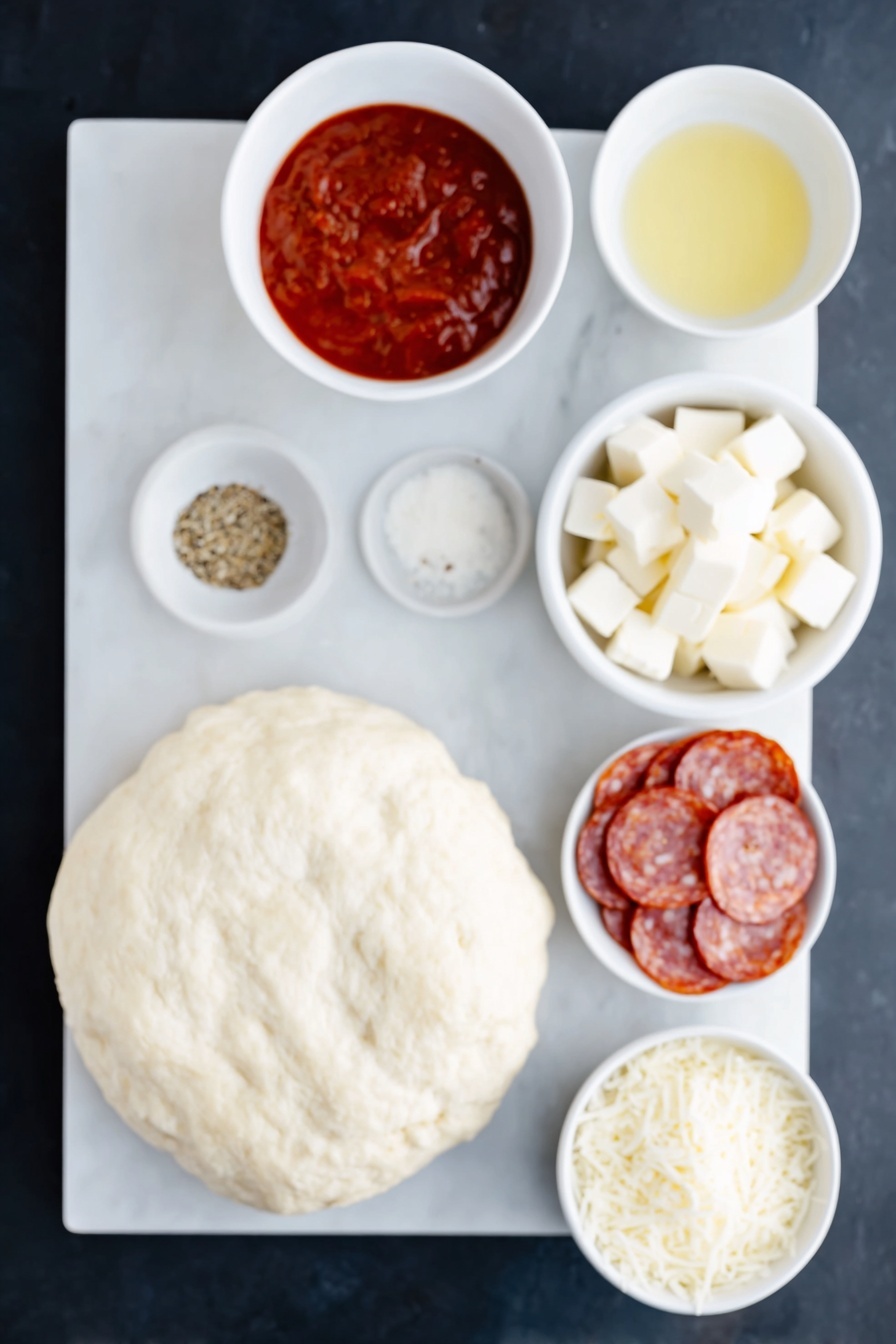
- Buttermilk biscuits: They give you that soft, pillowy base without the hassle of making dough from scratch.
- Pizza sauce: Choose a flavorful one—it’s your key to that authentic pizza taste inside each bomb.
- Mini pepperoni slices: Tiny, spicy, and perfectly sized to fit inside without overwhelming the bite.
- Mozzarella cheese cubes: Melts beautifully and creates those stretchy, cheesy pockets everyone loves.
- Unsalted butter: Mixing this with garlic and herbs results in a stunningly flavorful glaze.
- Garlic salt and Italian seasoning: They add depth and the classic Italian flavor punch.
- Parmesan cheese: Grated fresh, it gives a salty, nutty finish that’s irresistible.
Tweak to Your Taste
One of my favorite things about this Cheesy Pizza Bombs with Garlic Butter and Pepperoni Recipe is how easy it is to make your own. Feel free to swap ingredients, add veggies, or dial up the spice according to what you love.
- Vegetarian variation: Replace pepperoni with sautéed mushrooms or roasted bell peppers—I’ve done this when my kids didn’t want meat, and they loved it just as much.
- Spicy kick: Add crushed red pepper flakes to your garlic butter or toss in some spicy sausage slices instead of pepperoni for an extra punch.
- Cheese mix: Try mixing mozzarella with cheddar or provolone for a different flavor profile—I often add a little smoked mozzarella for a subtle smokiness.
- Gluten-free: Swap the biscuits with your favorite gluten-free dough or pre-made gluten-free biscuit dough, but watch your bake time carefully.
Step-by-Step: How I Make Cheesy Pizza Bombs with Garlic Butter and Pepperoni Recipe
Step 1: Set Up and Prep Your Base
First off, preheat your oven to 375°F and grease a 12-inch oven-safe skillet with nonstick spray. I find that using a skillet helps the bombs crisp up beautifully. Next, open your can of buttermilk biscuits and carefully separate them on a clean surface. Using a rolling pin, flatten each biscuit to around 1/8-inch thickness — don’t skip this step; it helps them wrap around the filling without tearing.
Step 2: Build Your Pizza Bombs
Lay out each flattened biscuit and spread 1 tablespoon of pizza sauce over it. Then, scatter about 1 tablespoon of mini pepperoni slices evenly on top, followed by 2 cubes of mozzarella. When folding, pinch the edges tightly so nothing leaks out during baking — this keeps all that melty cheese inside where it belongs!
Step 3: Get Baking
Place each sealed pizza bomb seam side down in your skillet. Once all are arranged, pop the skillet into your preheated oven and bake for 20 to 22 minutes. You’ll know they’re done when the biscuits turn golden brown and irresistible. This part is so satisfying—the smell alone will have everyone hovering.
Step 4: Garlic Butter Finish
While the pizza bombs bake, mix melted butter, garlic salt, Italian seasoning, and parmesan cheese in a small bowl. Right after you take the bombs out of the oven, brush this garlic butter all over the top to add an extra layer of flavor and that beautiful glossy finish. Serve them warm with the leftover pizza sauce for dipping. You won’t regret it.
Pro Tips for Making Cheesy Pizza Bombs with Garlic Butter and Pepperoni Recipe
- Rolling Thin but Not Too Thin: I learned that if you roll the biscuits too thin, they can tear when wrapping — aim for about 1/8-inch thickness to get just the right dough stretch.
- Sealing the Edges Well: Pinch the edges tightly and even press with a fork if needed to avoid leaking cheese and sauce during baking.
- Use an Oven-Safe Skillet: Using a skillet lets you easily slide your pizza bombs in and out of the oven while ensuring even browning on the bottom.
- Don’t Skip the Garlic Butter: Brushing with garlic butter right out of the oven creates a rich, savory glaze that transforms these from good to unforgettable.
How to Serve Cheesy Pizza Bombs with Garlic Butter and Pepperoni Recipe
Garnishes
I love to sprinkle a little extra grated Parmesan and some chopped fresh parsley over the bombs for a pop of color and a hint of freshness. A dash of red pepper flakes never hurts if you like a bit of heat on the side. Those little touches elevate the dish and make it feel more festive.
Side Dishes
These pizza bombs are the stars of the show, but I often serve them alongside a crisp Caesar salad or roasted garlic green beans to balance the richness. For a cozy night in, tomato basil soup pairs beautifully as a dipping companion—you’ll feel like you’re dining out without stepping foot outside.
Creative Ways to Present
For special occasions, I like to arrange these pizza bombs in a circular pattern on a large platter with small bowls of different dipping sauces—ranch, spicy marinara, even a creamy pesto one year! You could also thread them onto large skewers for a fun pizza-bomb “kabob.” Kids love this playful presentation.
Make Ahead and Storage
Storing Leftovers
After they’ve cooled, I store leftover pizza bombs in an airtight container in the fridge. They’ll keep well for up to 3 days, making for perfect next-day snacks or quick lunches. Just be sure to reheat them properly to keep that dough fluffy and the cheese melty.
Freezing
I sometimes prep a double batch and freeze half before baking. After assembling the bombs, place them on a parchment-lined tray and freeze until firm, then transfer to a freezer bag. When you want, bake them straight from frozen—just add a bit more time. It’s a lifesaver when you want homemade snacks without the fuss.
Reheating
To warm up leftovers, I prefer the oven or air fryer instead of the microwave, which can make the dough soggy. Heat at 350°F for about 8–10 minutes until warmed through and crispy again. Don’t forget to brush on a little more garlic butter after reheating—that’ll bring back the fresh-baked flavor every time.
FAQs
-
Can I make these pizza bombs ahead of time?
Absolutely! You can assemble the pizza bombs, freeze them unbaked, and then bake them later straight from frozen—just add a few extra minutes to the bake time. This makes prep super convenient.
-
Can I use a different type of biscuit dough?
You can! Just make sure the biscuits aren’t flaky layers, as that texture won’t hold the filling as well. Buttermilk-style biscuits work best for this recipe’s soft yet sturdy crust.
-
What’s the best way to prevent cheese from leaking out?
Pinching the edges firmly and making sure the dough isn’t torn is key. You can use a little water as “glue” on the edges before sealing to help keep them closed tight.
-
Can I make these without pepperoni?
Of course! Just swap in veggies like mushrooms, olives, or spinach for a vegetarian version, or even cooked sausage if you like. The recipe is very versatile.
-
Can I cook these in the air fryer?
Yes! Air fry assembled pizza bombs at 350°F for about 11–12 minutes until golden brown, then brush with garlic butter and serve.
Final Thoughts
This Cheesy Pizza Bombs with Garlic Butter and Pepperoni Recipe has become one of my go-to comfort foods whenever I want to treat myself or entertain effortlessly. The combo of flavors and ease of prep make it a clear winner in my kitchen. If you try it, I bet it’ll become a favorite in your home too—you’ll love how these delicious bombs bring everyone together and spark smiles all around the table.
Print
Cheesy Pizza Bombs with Garlic Butter and Pepperoni Recipe
- Prep Time: 10 minutes
- Cook Time: 22 minutes
- Total Time: 32 minutes
- Yield: 8 servings
- Category: Appetizer
- Method: Baking
- Cuisine: American
Description
Delicious and easy-to-make Pizza Bombs featuring soft buttermilk biscuits filled with mozzarella, pepperoni, and pizza sauce, baked to golden perfection and topped with a flavorful garlic butter spread. Perfect as a fun appetizer or snack.
Ingredients
Pizza Bombs
- 1 can (8-count) Southern Homestyle buttermilk biscuits, not flaky
- 1 cup (257 g) pizza sauce, divided
- ½ cup (69 g) mini pepperoni slices, divided
- 4 ounces mozzarella cheese, cut into 16 equal-sized cubes, divided
Garlic Butter
- ¼ cup (½ stick / 57 g) unsalted butter, melted
- ¼ teaspoon garlic salt
- ¼ teaspoon Italian seasoning
- 2 tablespoons parmesan cheese, grated
Instructions
- Preheat Oven: Preheat the oven to 375°F and spray a 12-inch oven-safe skillet with nonstick spray. You can also use a greased baking dish, noting the cooking time may vary.
- Prepare Biscuits: Remove the biscuits from the can and place them on a clean work surface. Using a rolling pin, flatten each biscuit to about ⅛-inch thickness to create a thin dough.
- Add Fillings: Top each flattened biscuit with 1 tablespoon of pizza sauce, 1 tablespoon of mini pepperoni slices, and 2 cubes of mozzarella cheese, spreading evenly over the surface.
- Seal Pizza Bombs: Fold the edges of each biscuit together, pinching them tightly to seal with no holes or gaps. Place each bomb seam side down into the prepared skillet, repeating this process with all bombs.
- Bake: Bake the pizza bombs for 22 minutes or until they turn a golden brown color and are cooked through.
- Make Garlic Butter: In a small bowl, combine the melted butter, garlic salt, Italian seasoning, and grated parmesan cheese to create a flavorful garlic butter mixture.
- Brush and Serve: After removing the pizza bombs from the oven, brush the garlic butter mixture generously over the tops. Serve with the remaining pizza sauce for dipping and enjoy!
Notes
- For an alternative cooking method, air fry assembled pizza bombs at 350°F for 12 minutes until golden brown; brush with garlic butter and serve with pizza sauce.
- You can substitute the mini pepperoni with other cured meats or vegetables to customize the filling.
- Use a rolling pin to ensure biscuits are evenly flattened for consistent cooking and sealing.
- Make sure to pinch the edges tightly to prevent cheese or sauce from leaking out during baking.
- If using a baking dish instead of skillet, monitor baking time as it may vary slightly.
Nutrition
- Serving Size: 1 bomb
- Calories: 220 kcal
- Sugar: 3 g
- Sodium: 400 mg
- Fat: 12 g
- Saturated Fat: 6 g
- Unsaturated Fat: 5 g
- Trans Fat: 0 g
- Carbohydrates: 20 g
- Fiber: 1 g
- Protein: 8 g
- Cholesterol: 30 mg

